Develop a theme
Developers are empowered to develop and customize themes for Salla Stores in a swift, effortless, and robust way. These customizations might range from minor tweaks to complete redesigns. Build extraordinary theme customizations through the Partners Portal and, then, publish them to the Store Themes Marketplace.
:::info[A thing to know!]
✅ Read and understand the Directory Structure for proper use of the Theme.
:::
📙 What You'll Learn
In this article, the developer will learn how to develop a theme in a local development environment and how to preview the new customization. The main outline will be:
Theme Development Workflow
The previous step includes the creation of a new theme files, which means that a local directory has been created for theme's files, which were cloned from the synced GitHub repository to a local development environment on the local machine.
:::tip[Tip]
If the theme was created using the Partner Portal, the developer will need to:
- Manually
git clonethe theme files from the synced GitHub repository to a local development environment on the local machine. - Run the command
npm installto download and install the dependencies listed in the package file 'package.json'. - Ensure that you have full administrative access to your local files to successfully complete the installation process.
:::
Next is to step inside the theme's directory and to run the Salla CLI command preview, and open the given starter theme with an IDE:
> cd theme_folder_name
> npm install
> salla theme preview
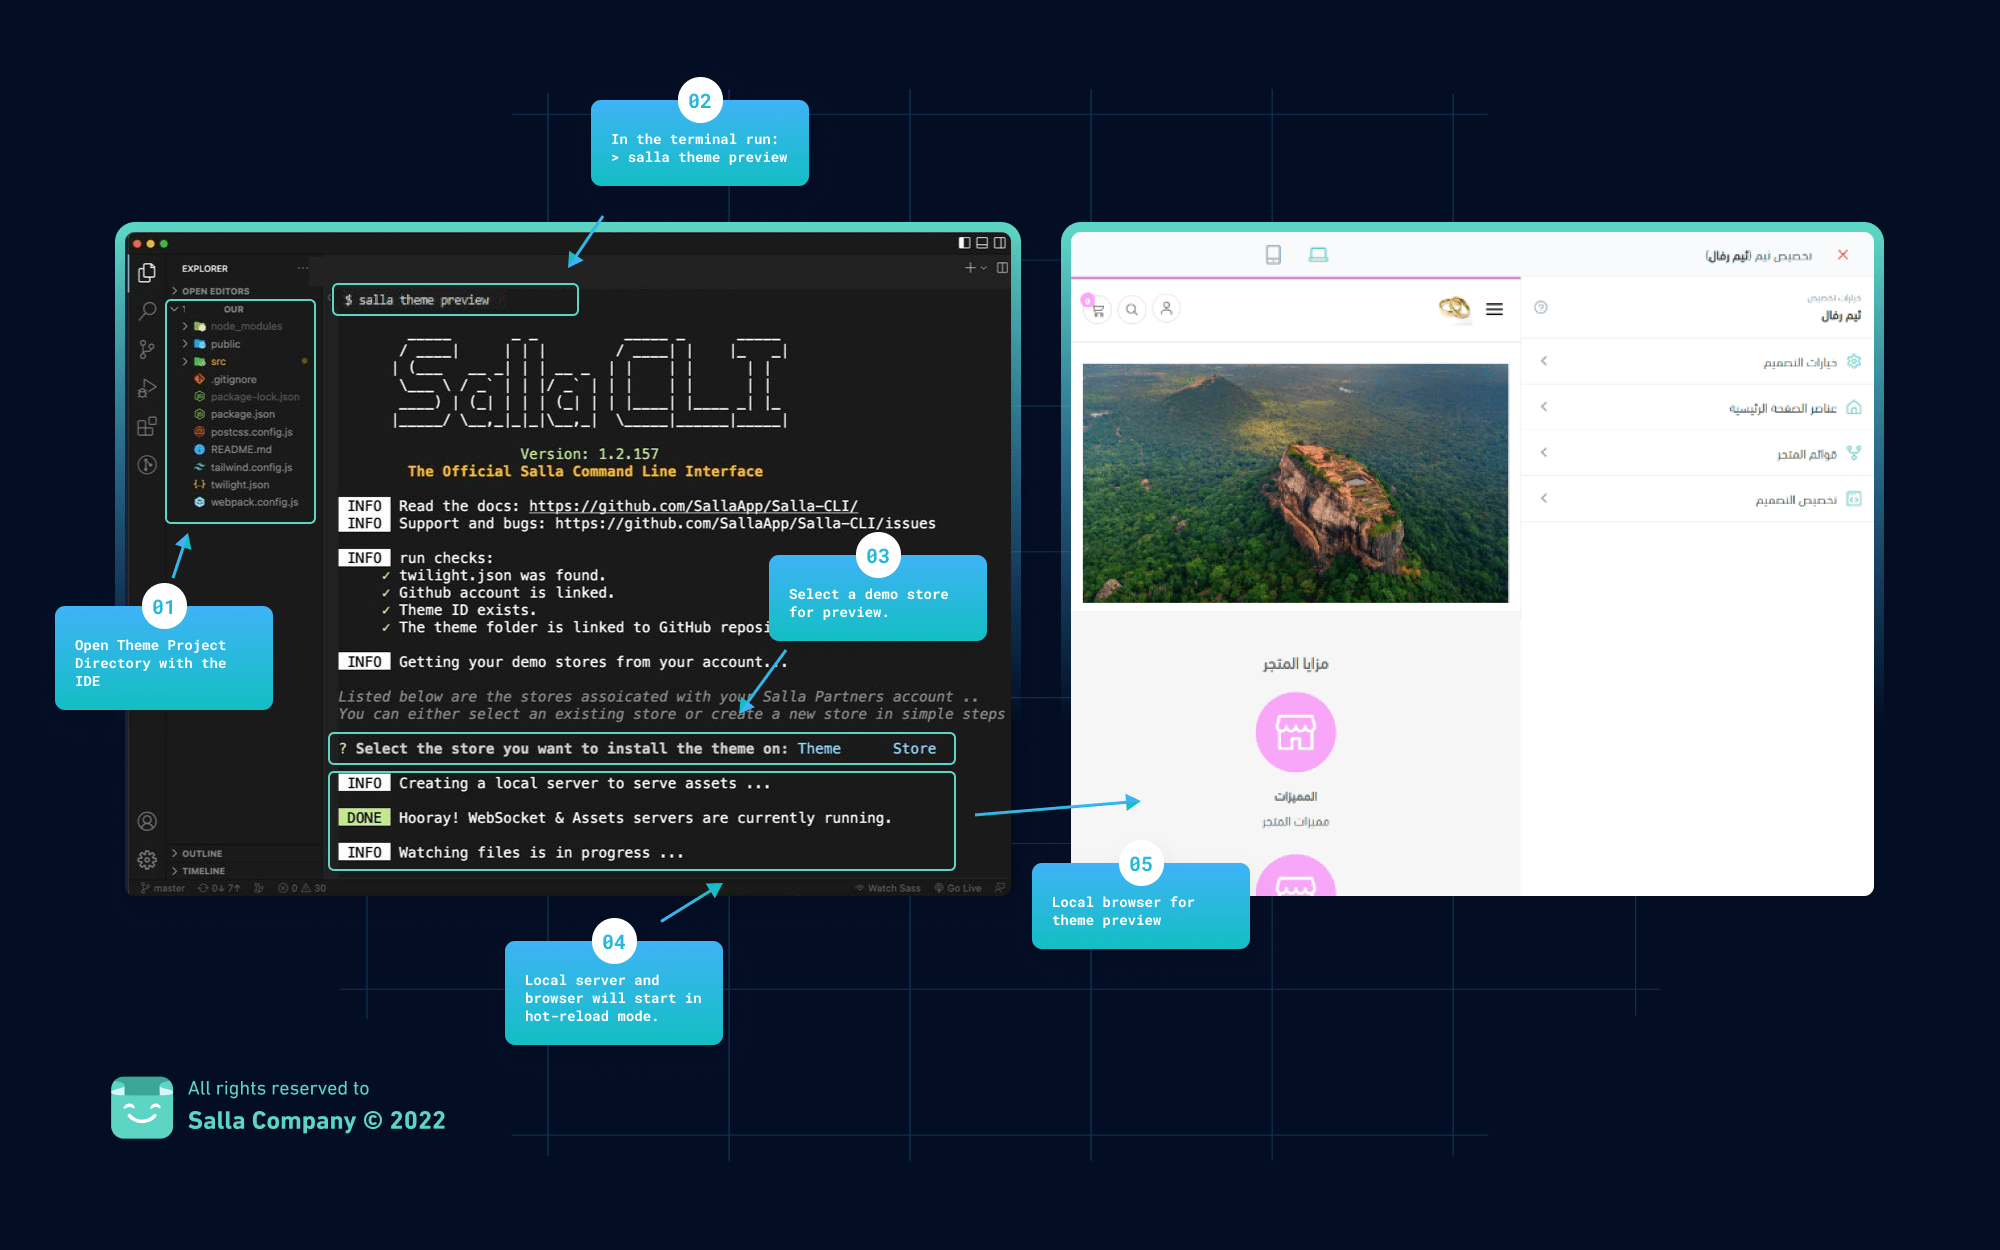
Salla has developed an interactive development environment that is launched with the command, salla theme preview. During the development process, the preview command will automatically handle the process of building and deploying the theme to a local server and preview browser. This will involve the following steps:
- Running a local development server to serve the local assets' directory.
- Opening a local preview browser with a selected demo store.
- Watching theme file changes.
- Hot reloading the current previewed page each time changes in assets or views are detected.
- Managing the preview environment including committing the changes to the synced GitHub repository if required.
The following image shows the development workflow:

This amazing workflow enables the developer to develop the theme just like any other client-side applications. This means that the developer has complete control over every step of the development process, starting with editing the theme's source code and quickly previewing any changes in the local browser.
Twilight Watcher Plugin
The Twilight Engine provides a Watcher plugin, which performs the task of tracking any changes in the theme's files and delivering these changes to the CLI in order to be reflected into the current preview. The Watcher plugin is included in the Webpack, which is simply a static module bundler for modern client-side applications.
When it processes the theme's files, Webpack creates an internal dependency structure from one or more entry points. The theme's files are then combined into one or more bundles, which are static assets that provide the theme's content by combining each module into a single file.
The developer needs to make sure the Twilight Watcher plugin is added to the webpack.config.js file. This file can be found in the root theme's directory. More information about Webpack can be found here.
:::info[Information]
The developer has the option to use any other static module bundler other than the Webpack.
:::
The Twilight Watcher Plugin can be added as follows:
const ThemeWatcher = require('@salla.sa/twilight/watcher');
module.exports = {
    ...
  plugins: [
    ...
    new ThemeWatcher()
  ],
}
