


Development Preparation
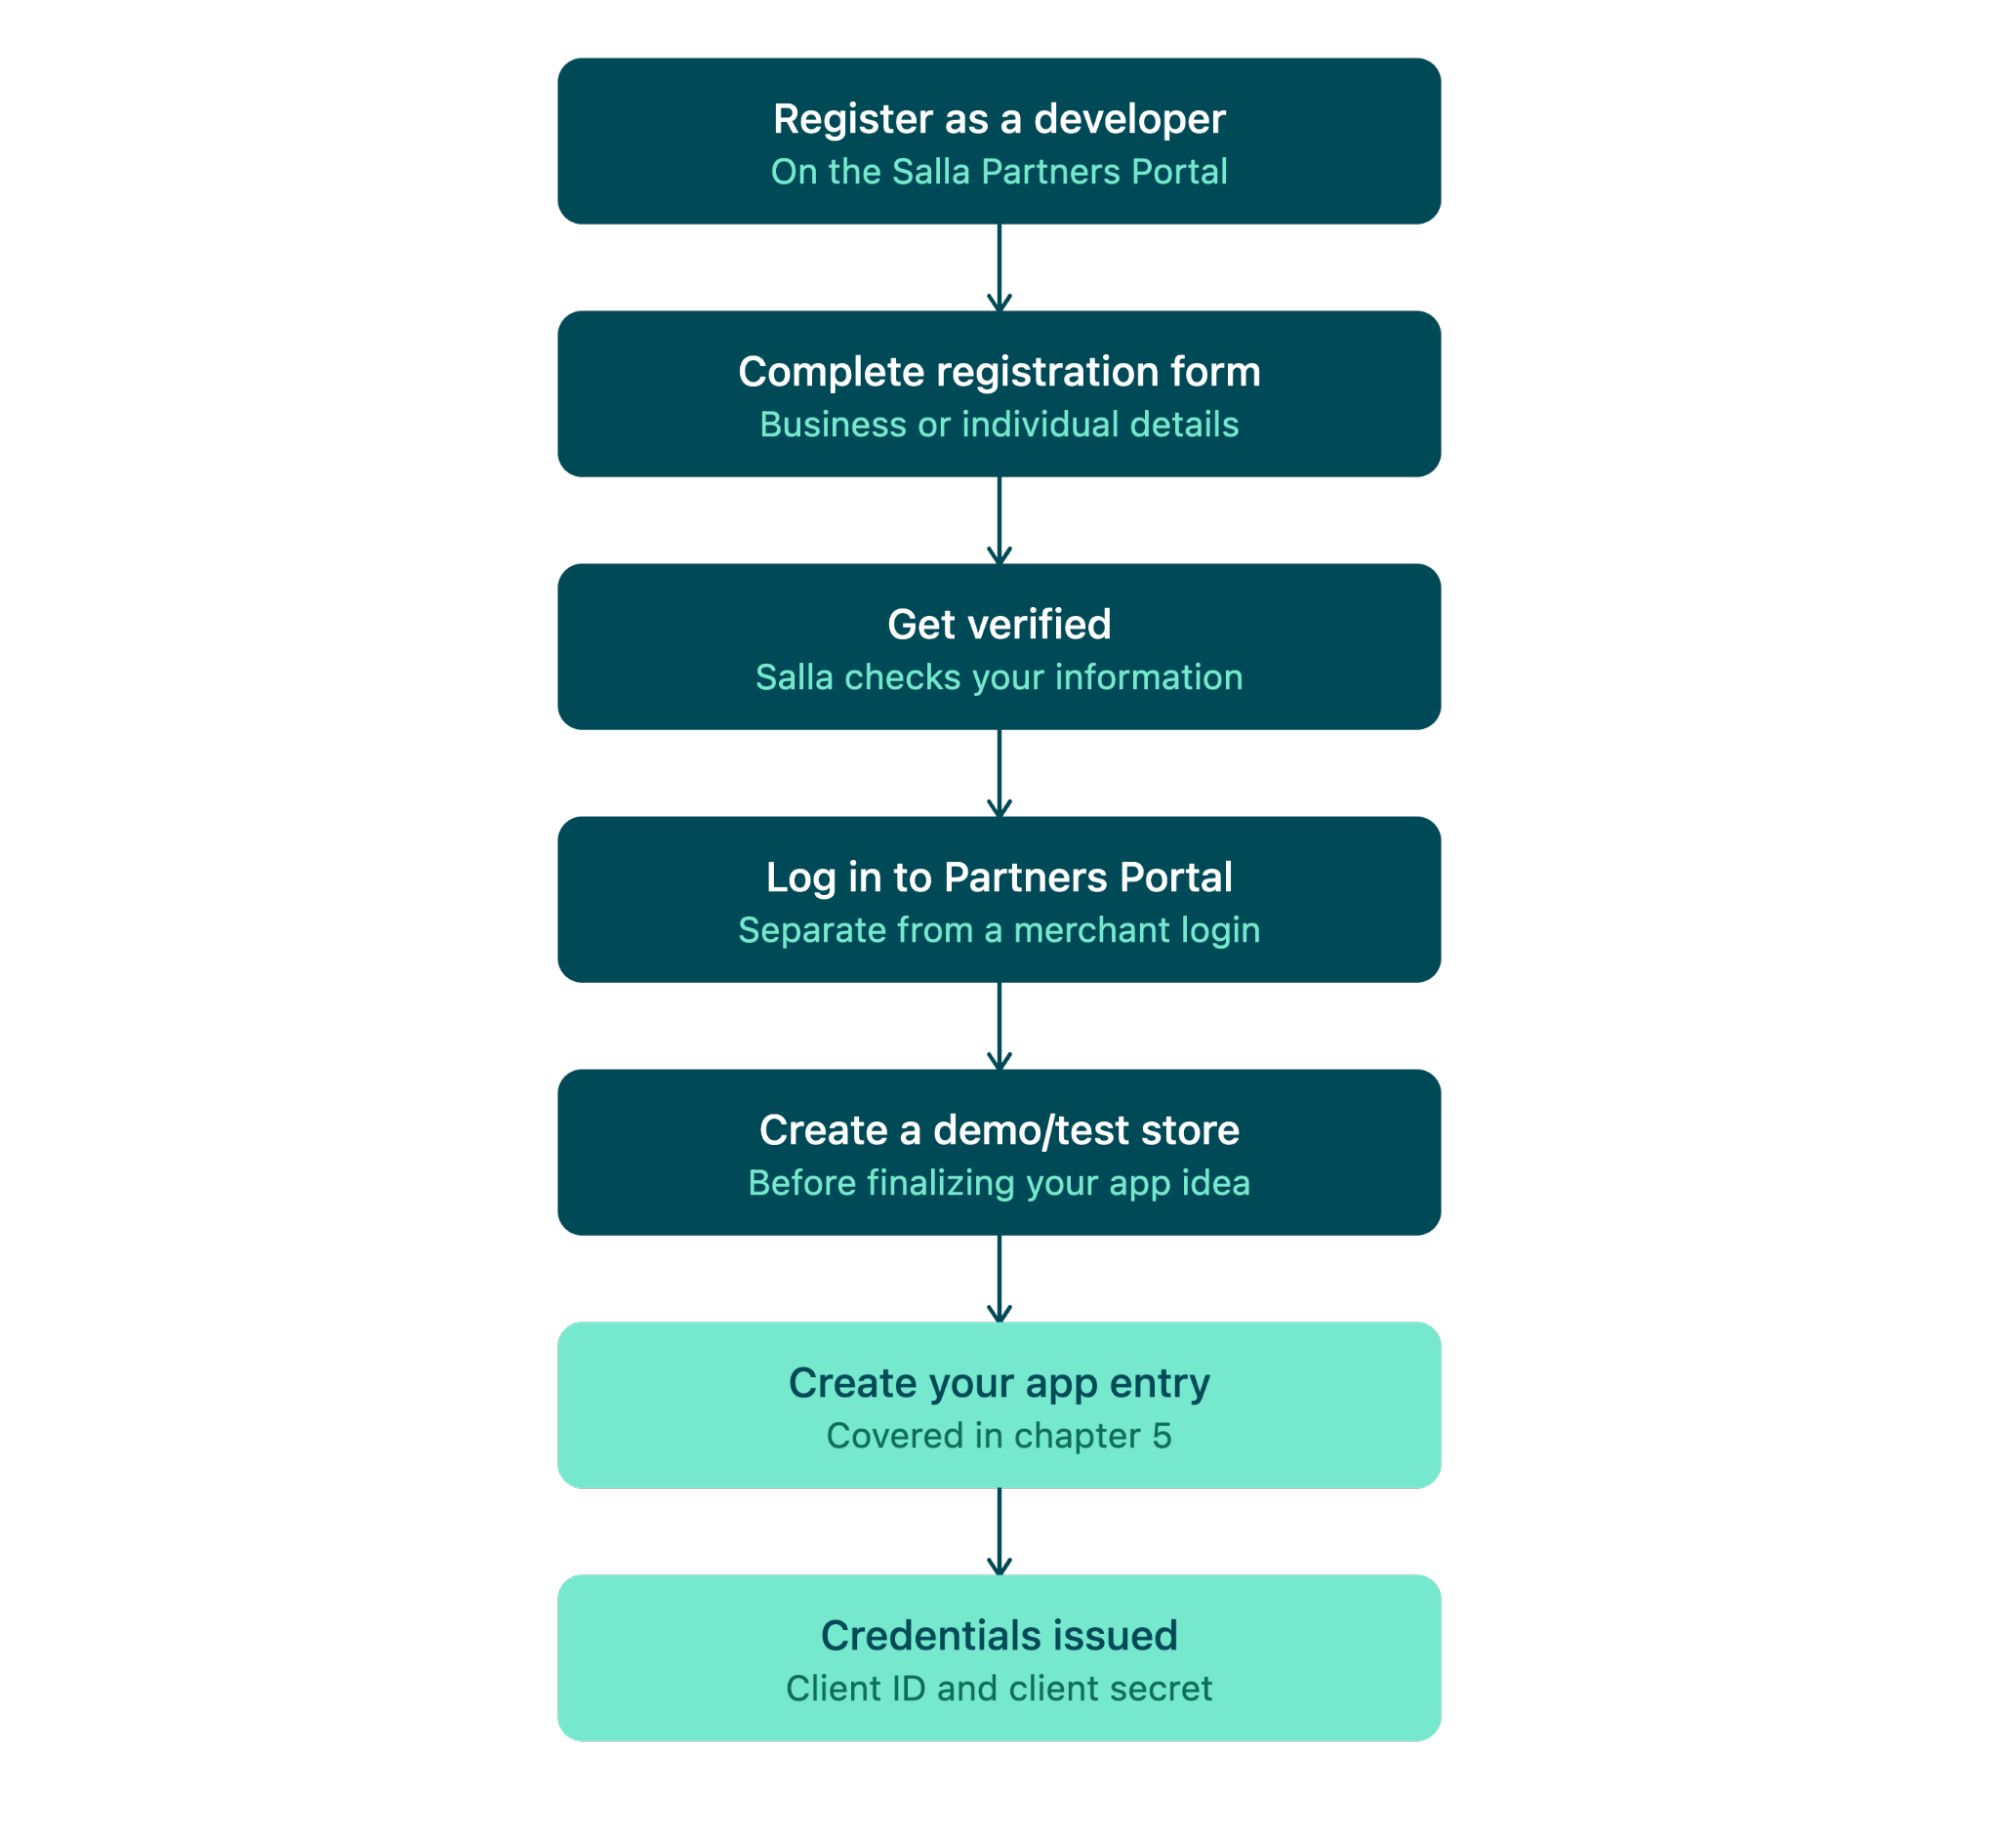
Figure 4.1 - Overview of the Partner registration and setup flow
Partner Account Setup, Step by Step
Register as a Developer
Go to the Salla Partners Portal and register as a Developer (see Introduction to Salla Partners if unsure which partner type fits you).
Complete the registration form
Complete the registration form with your business or individual details. Salla verifies this information before granting full access.
Log in to the Partners Portal
Once verified, log in to the Partners Portal dashboard, separate from any merchant store login, with its own credentials.
Create a demo/test store
From the dashboard, create a demo/test store immediately, even before your app idea is finalized, you will need it for every step that follows.
Check Your Account Type
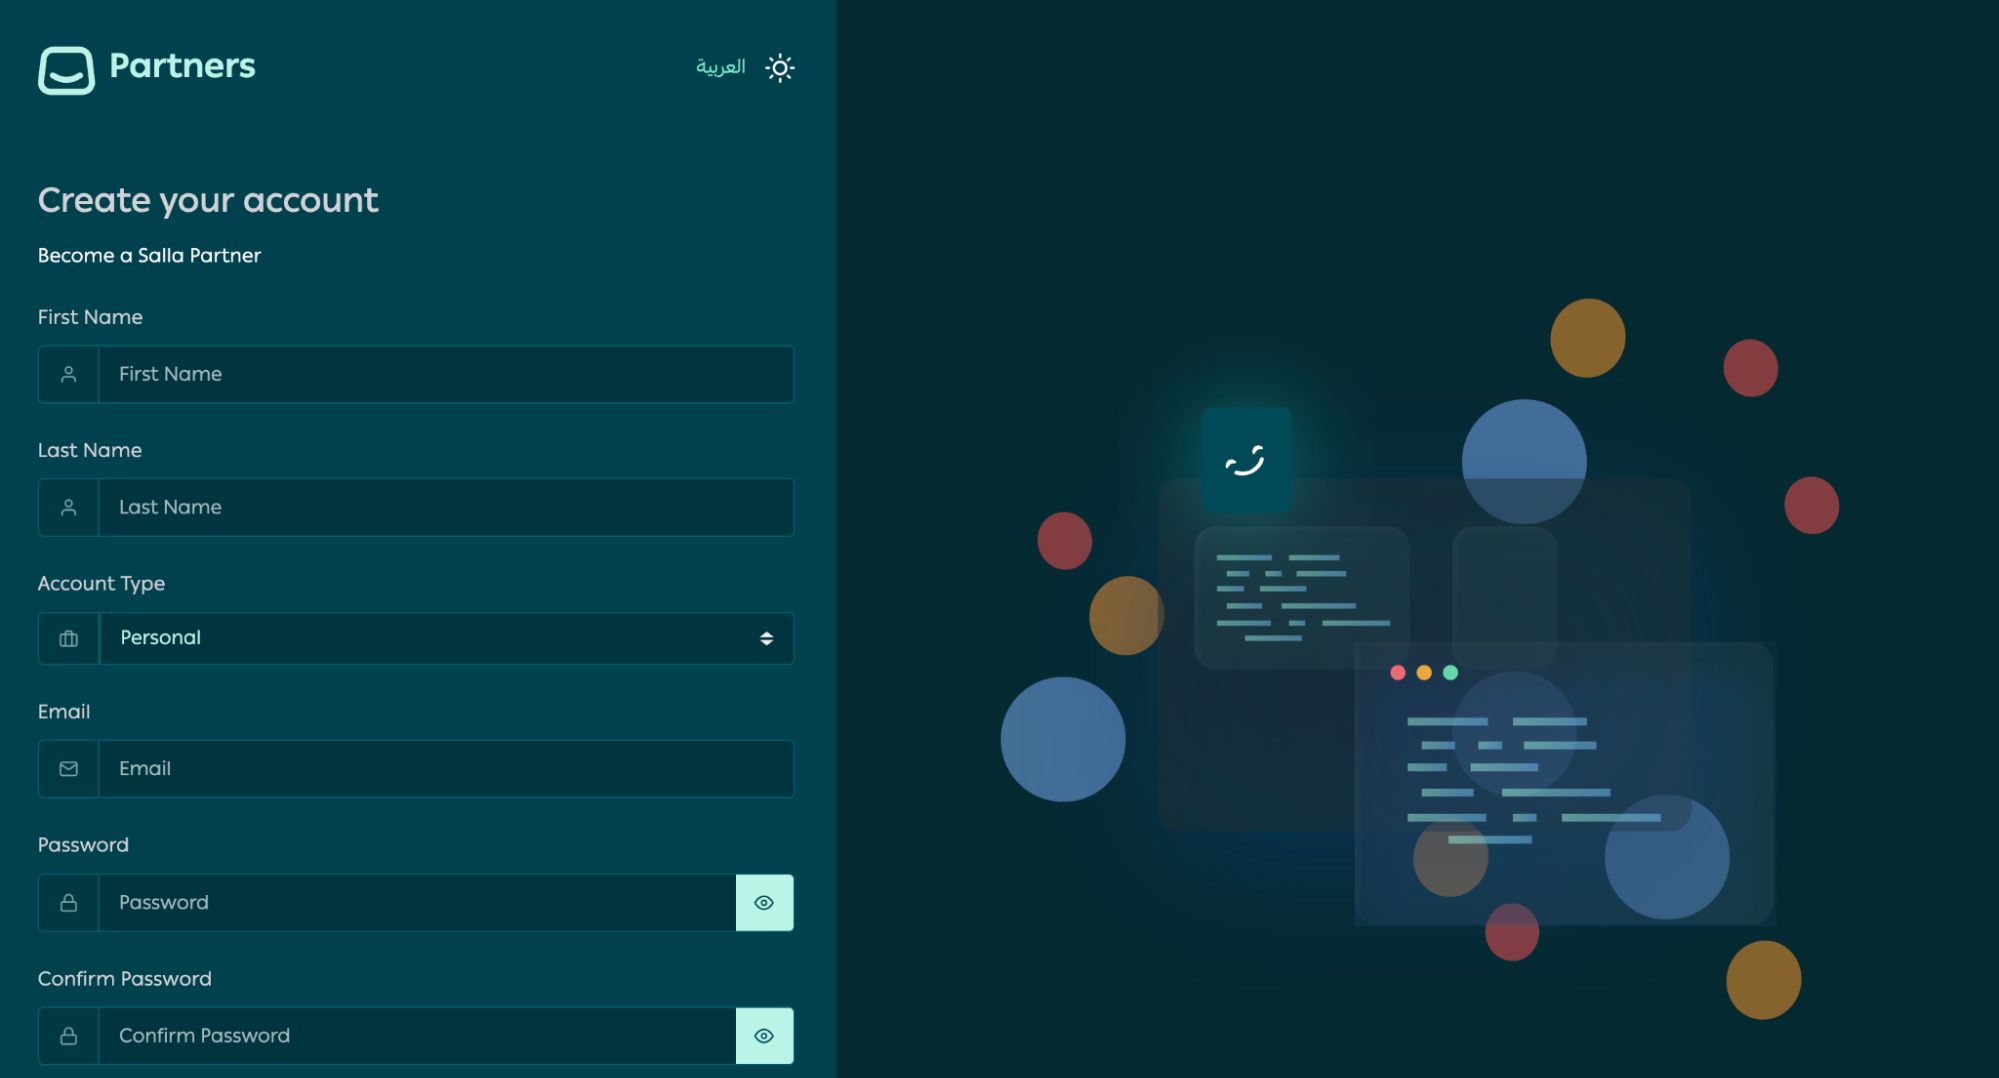
Figure 4.2 - The Salla Partners Portal registration form
Verifying your Salla Partner account process:
Open ID Verification
Under the setting section, click on ID Verification.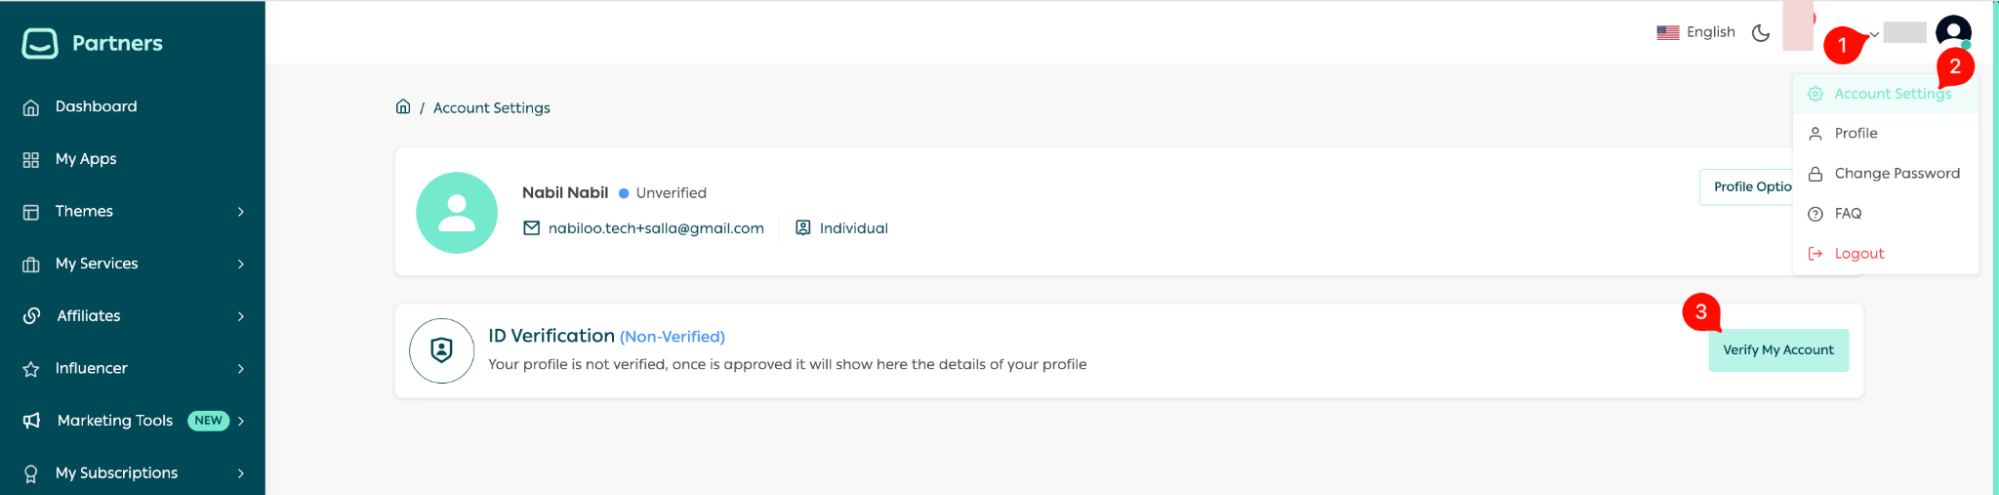
Figure 4.3 - Open ID Verification from your account settings
Fill out your identity information
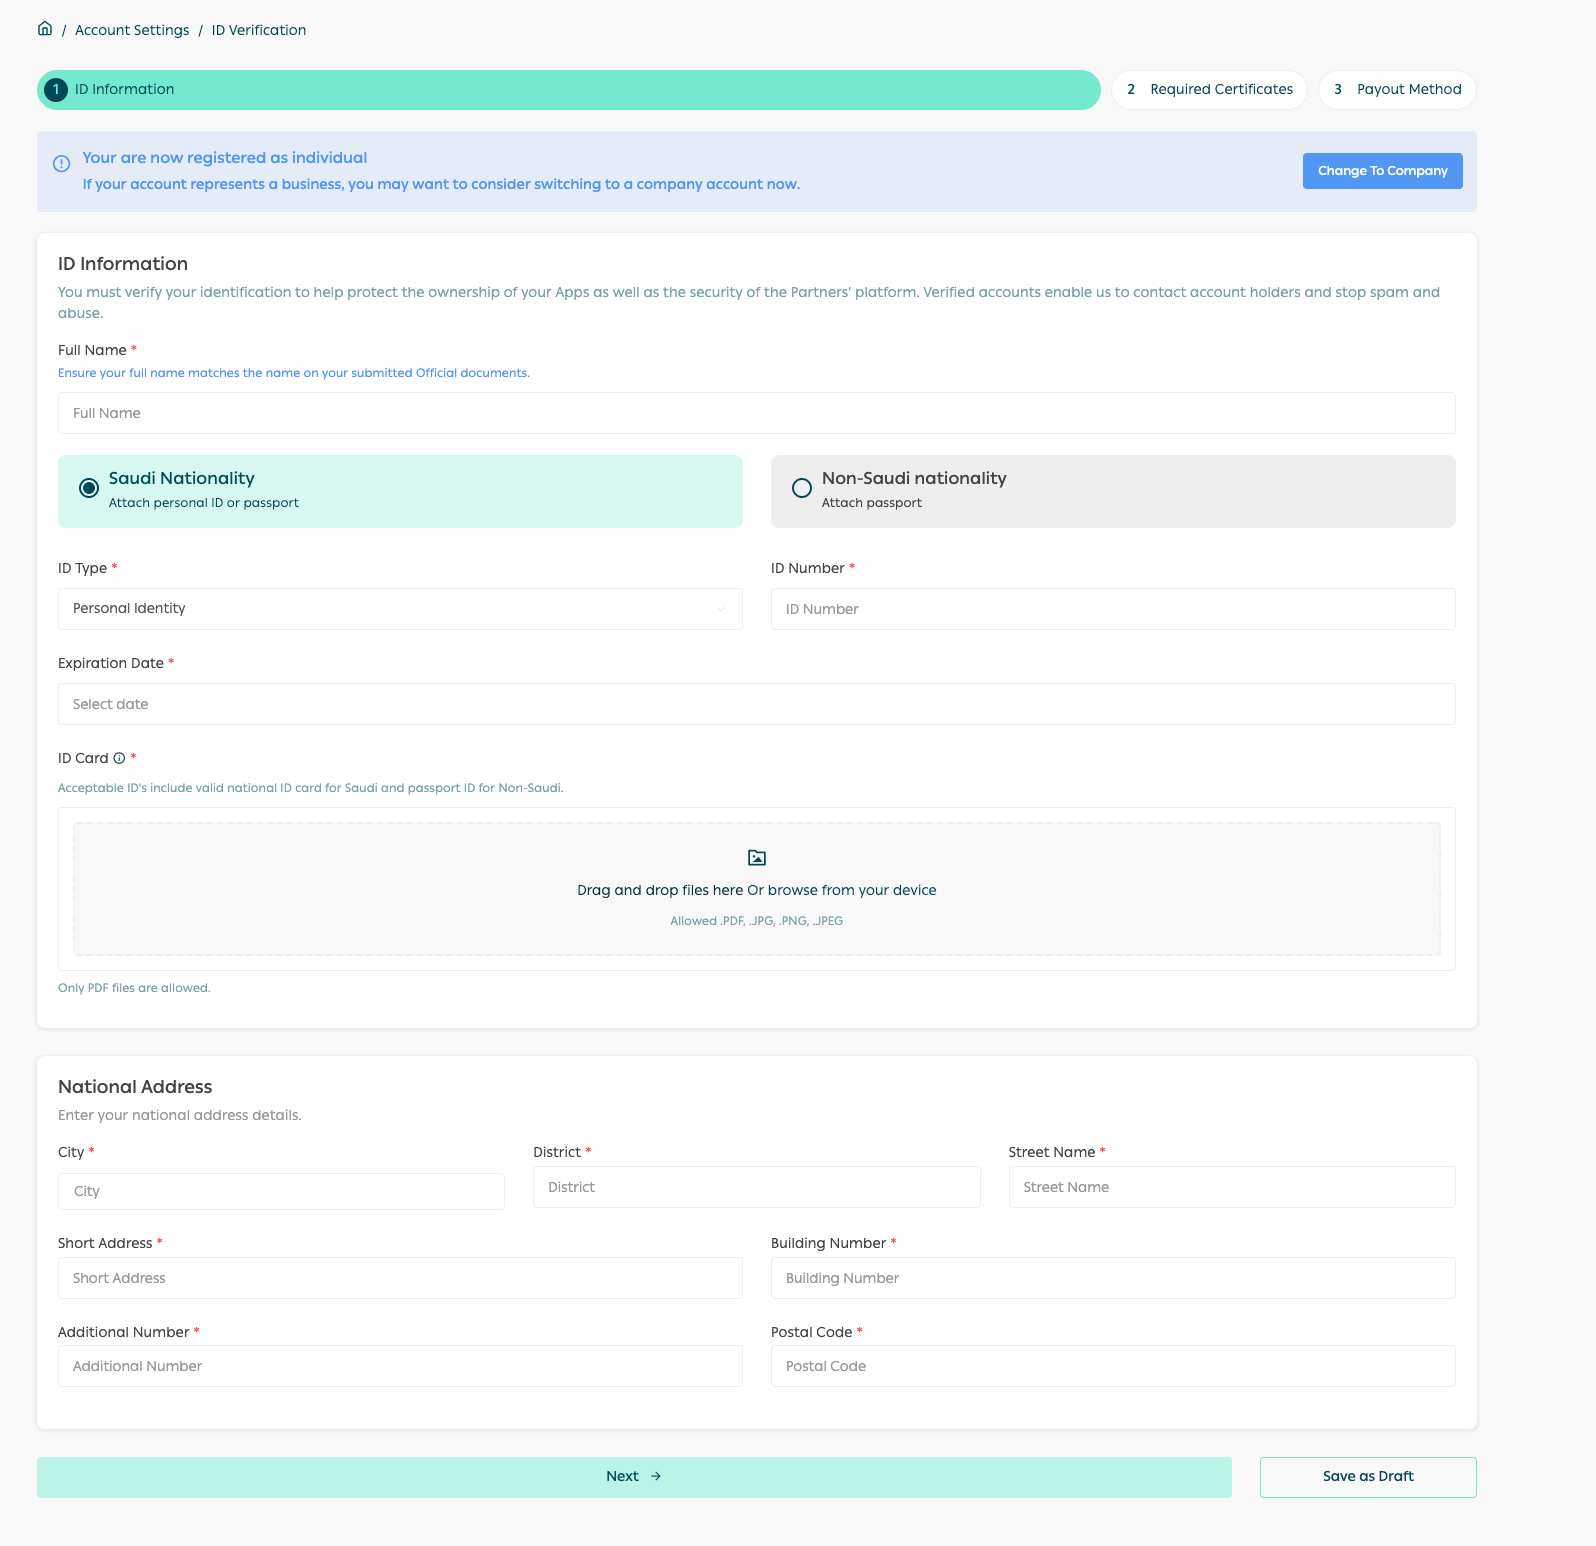
Figure 4.4 - The application after being downloaded from the app store; the app got auto-authorized
Upload the required documents
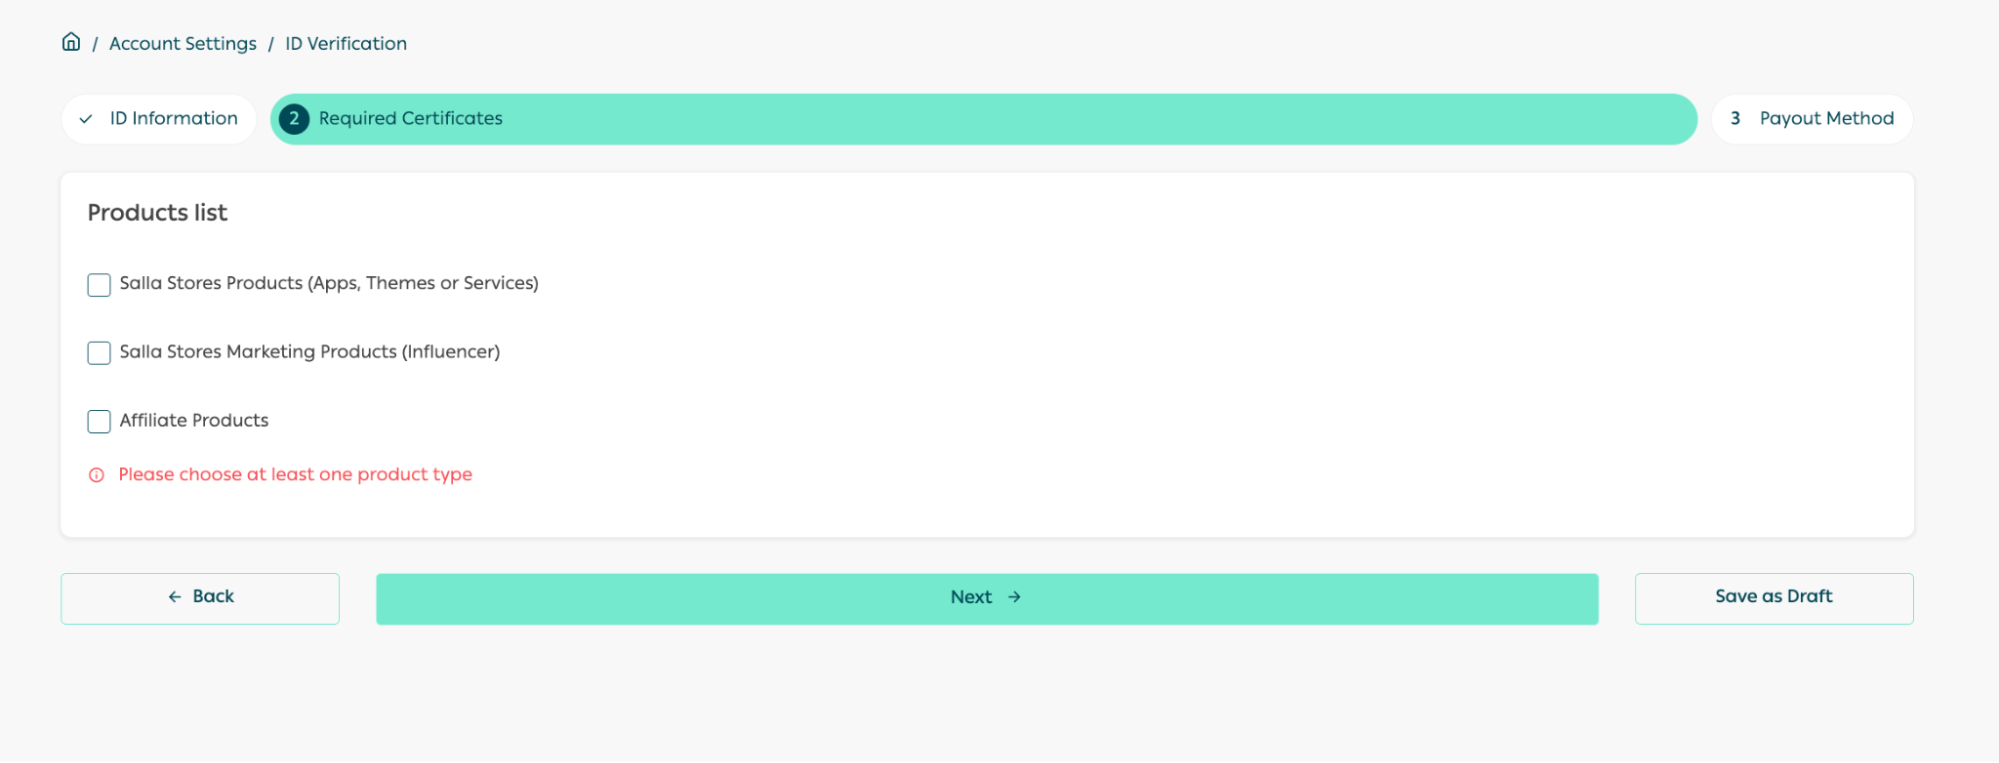
Figure 4.5 - Select from the product list what represents you and upload its required document
Fill in the payment accounts
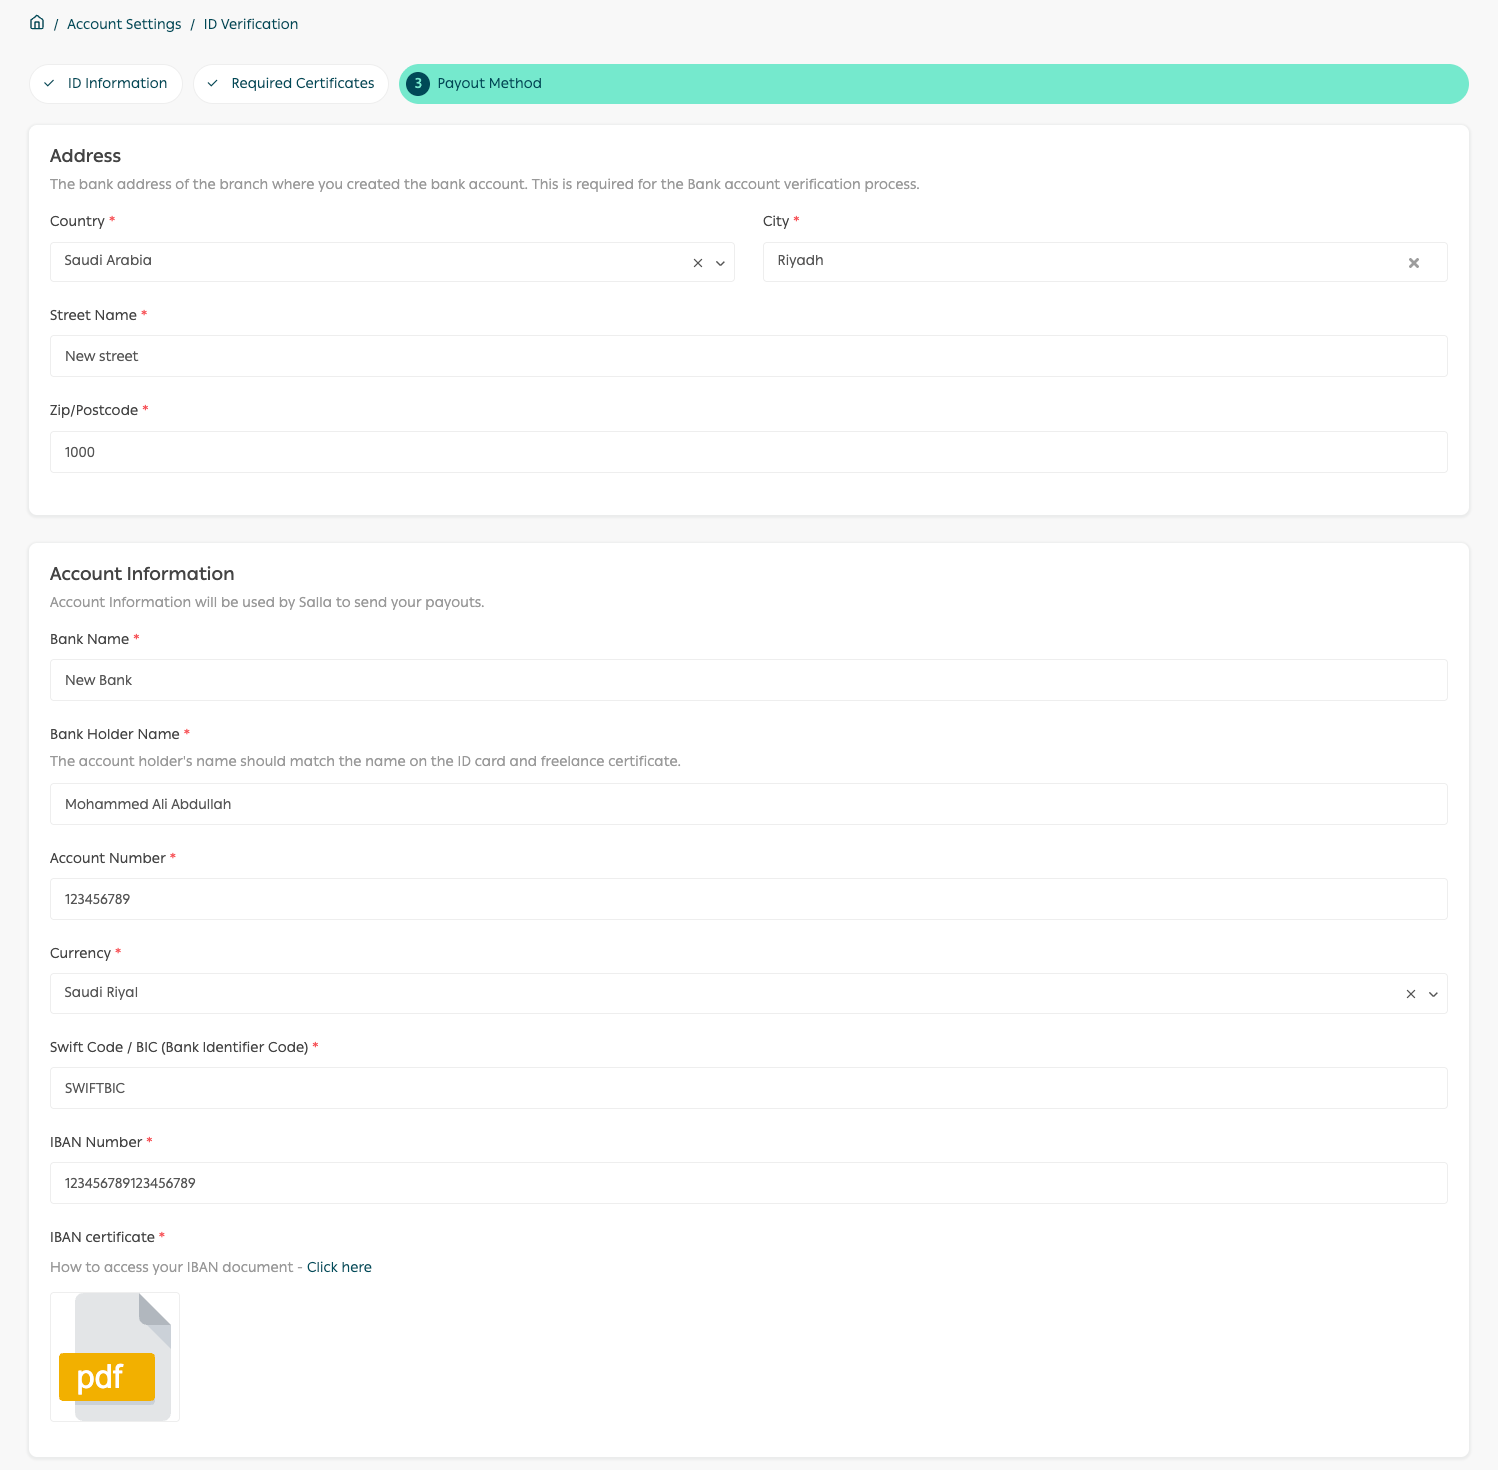
Figure 4.6 - Fill in the payment accounts
Request verification
Once you done, click on ask to verify, the team will review your request, and you will get an email response.
Confirm the verified label
By the end of the process, you will see the verified label on top of your account setting page, like image below.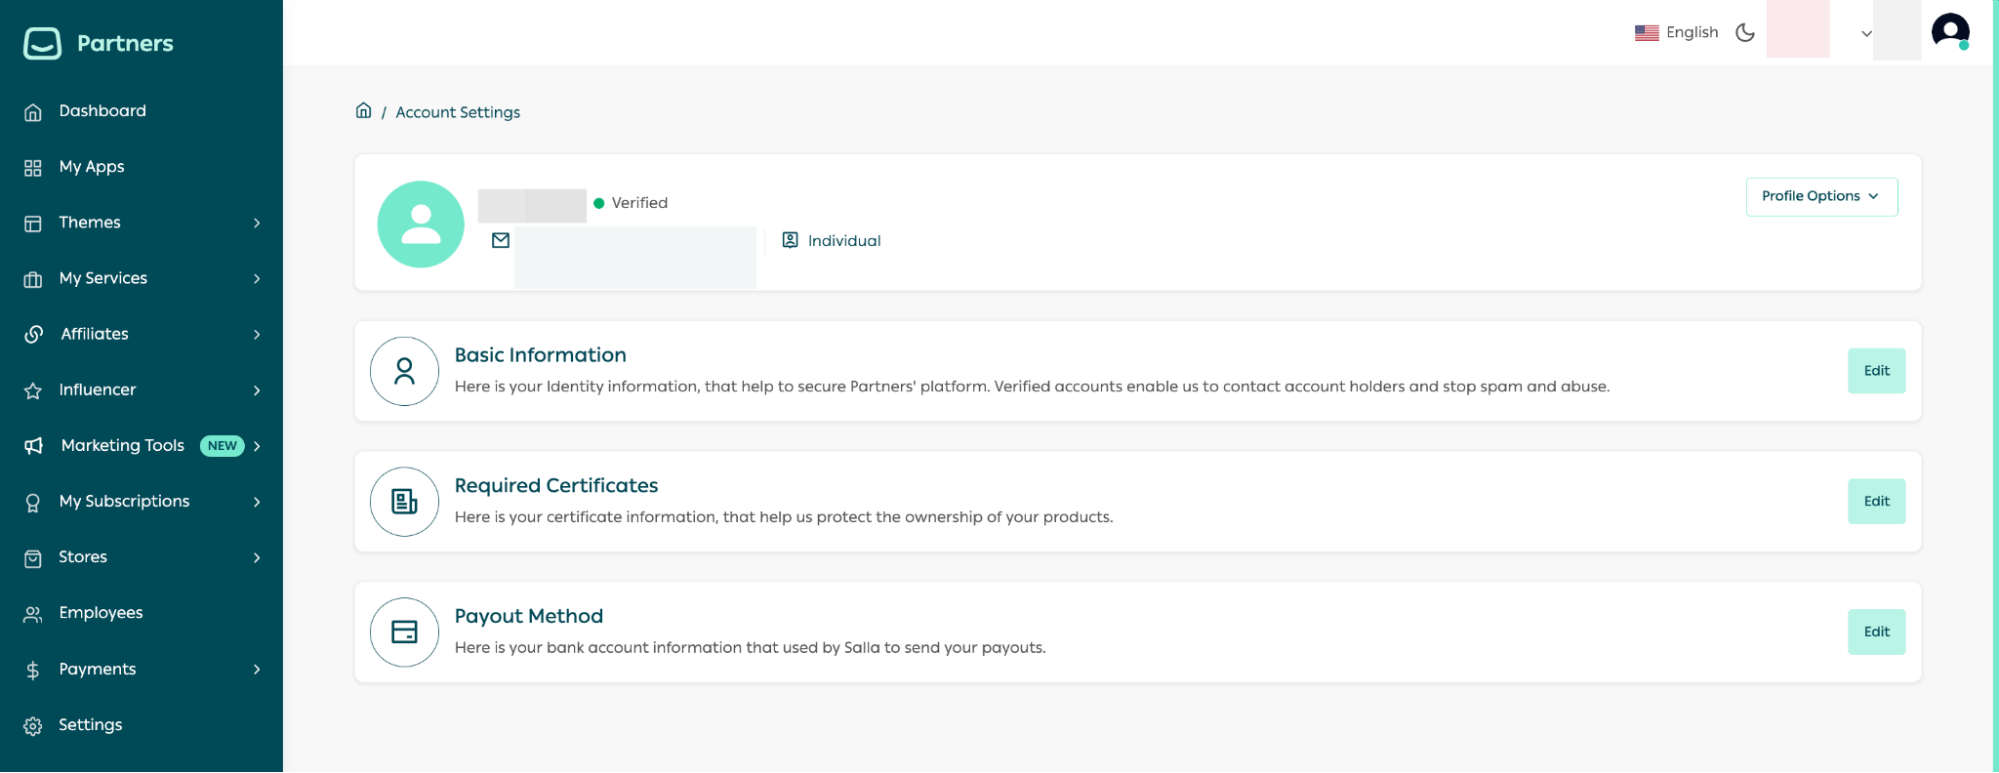
Figure 4.7 - The verified label shown on your account settings page
Access Requirements
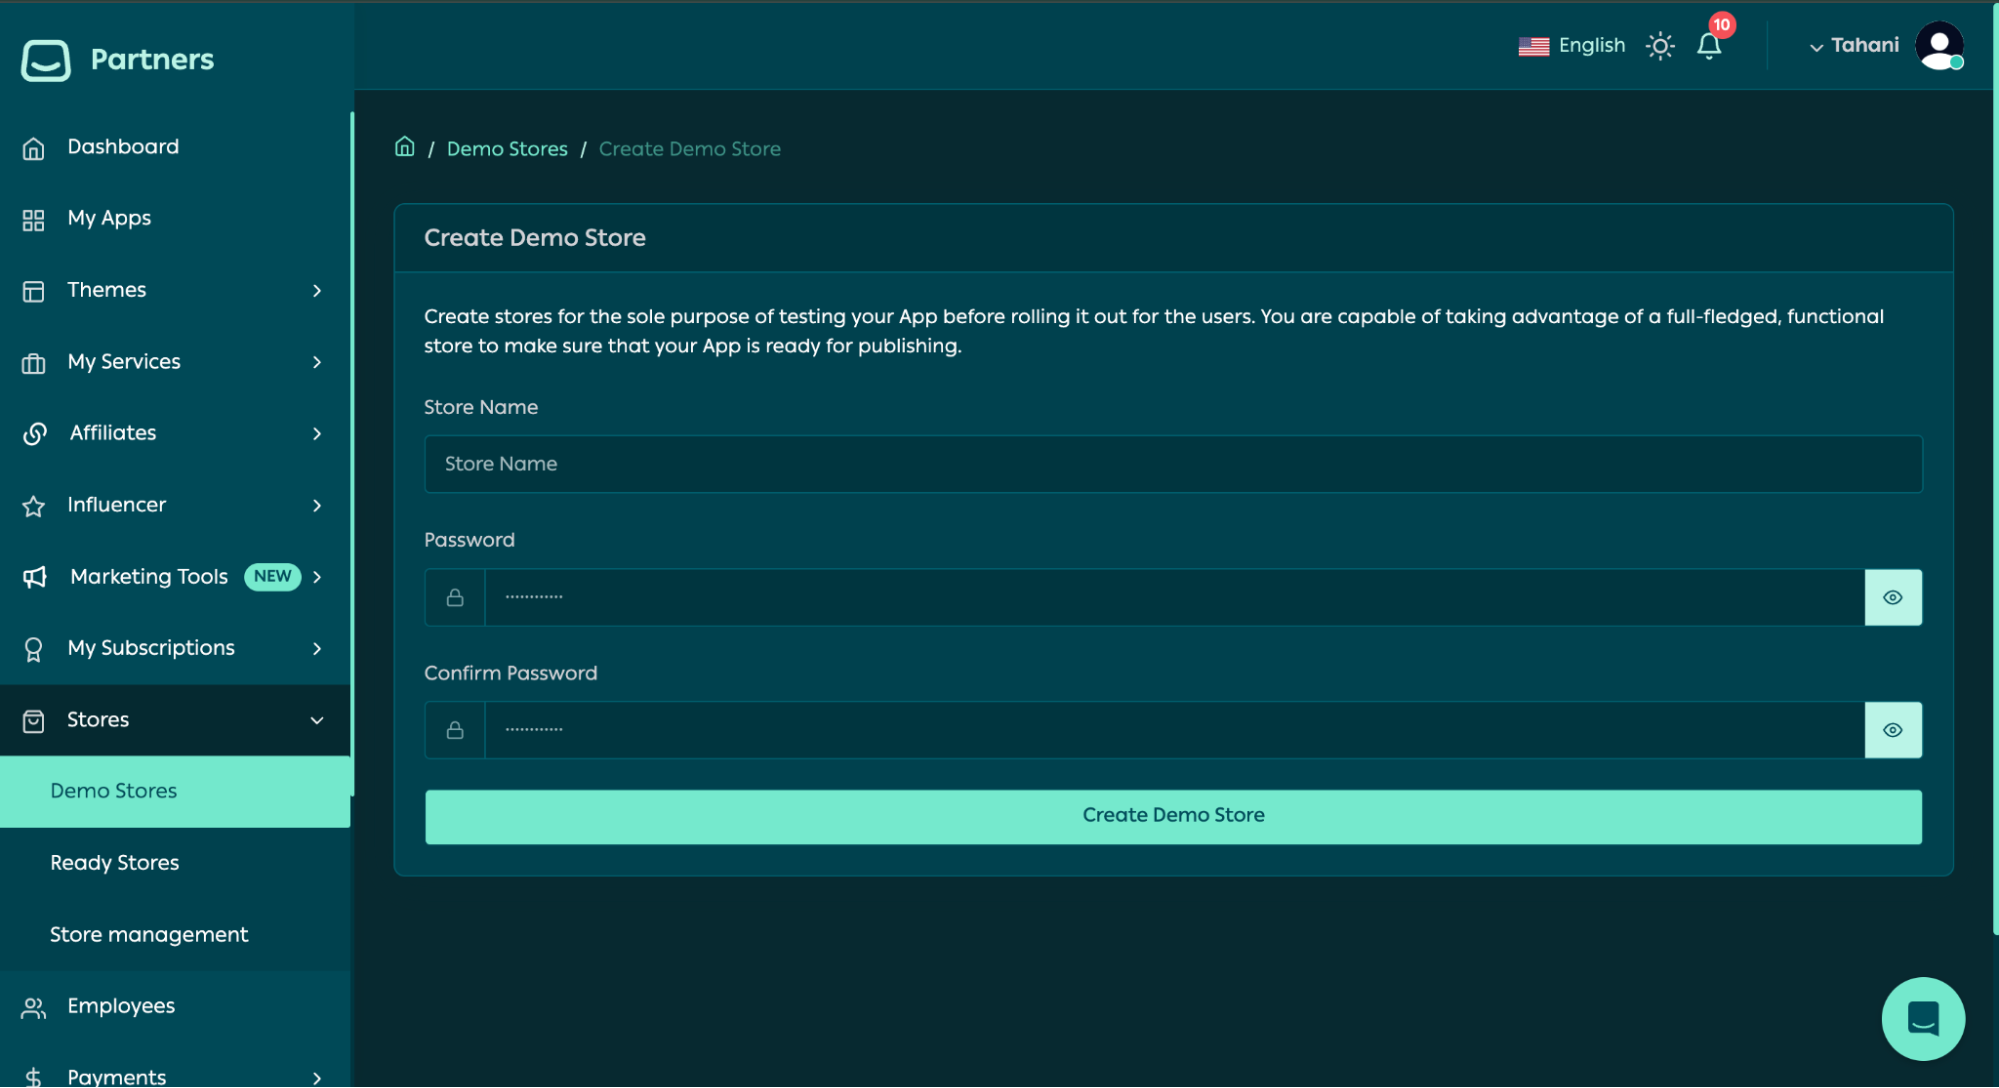
Figure 4.8 - Creating a demo store from the Partners Portal
Development Environment, Step by Step
Choose your language/framework
Salla's APIs are standard REST endpoints, so any modern backend stack works.
Install a local tunneling tool
Install a local tunneling tool (e.g., ngrok) so Salla can send webhook events to your machine while you develop locally, webhooks require a publicly reachable URL, and your laptop is not one by default.
Set up version control
Set up version control (git) from the first commit, including a .gitignore that excludes credentials and environment files.
Create a .env file
Create a .env file (or your framework's equivalent) for your client ID, client secret, and any third-party API keys, never hard-code these into source files.
Best Practices
Common Mistakes
Salla App Standards
Security Requirements
Performance Expectations
UX Guidelines
Compliance Requirements
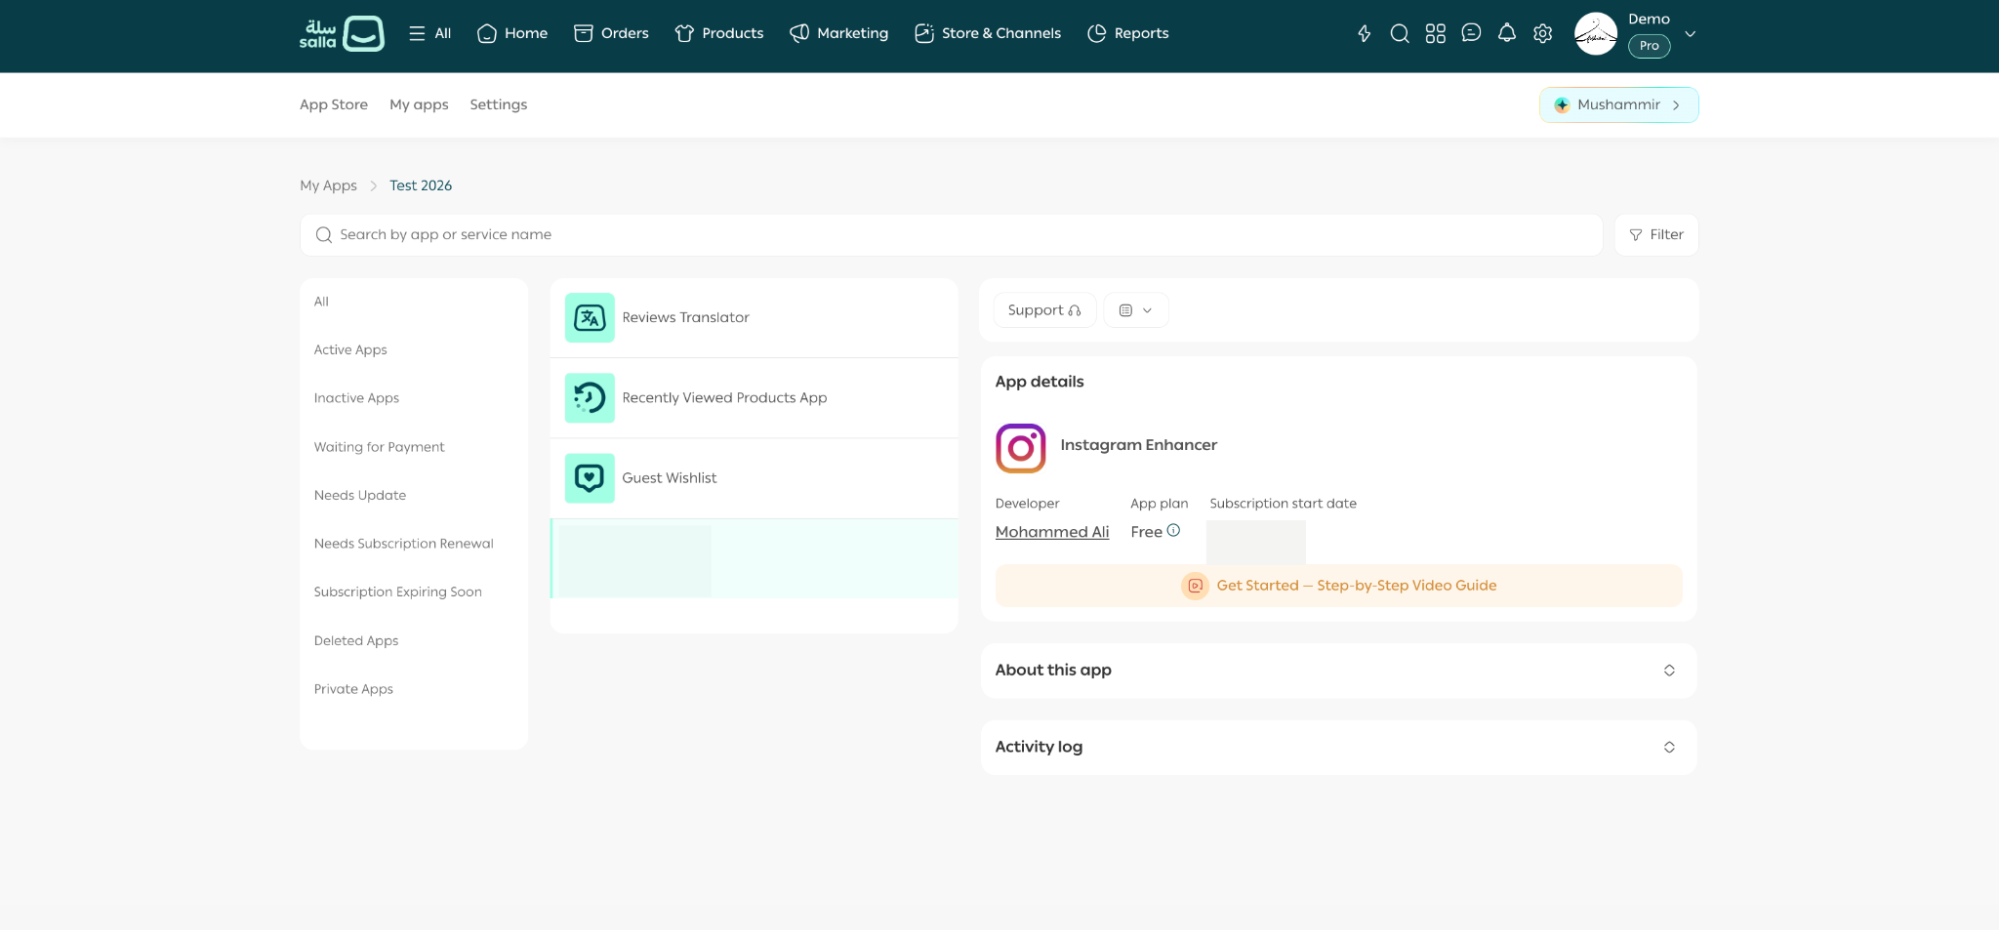
Figure 4.9 - The OAuth scope-approval screen a merchant sees during install
Best Practices
Common Mistakes
Technical Architecture Overview
How Salla Apps Work
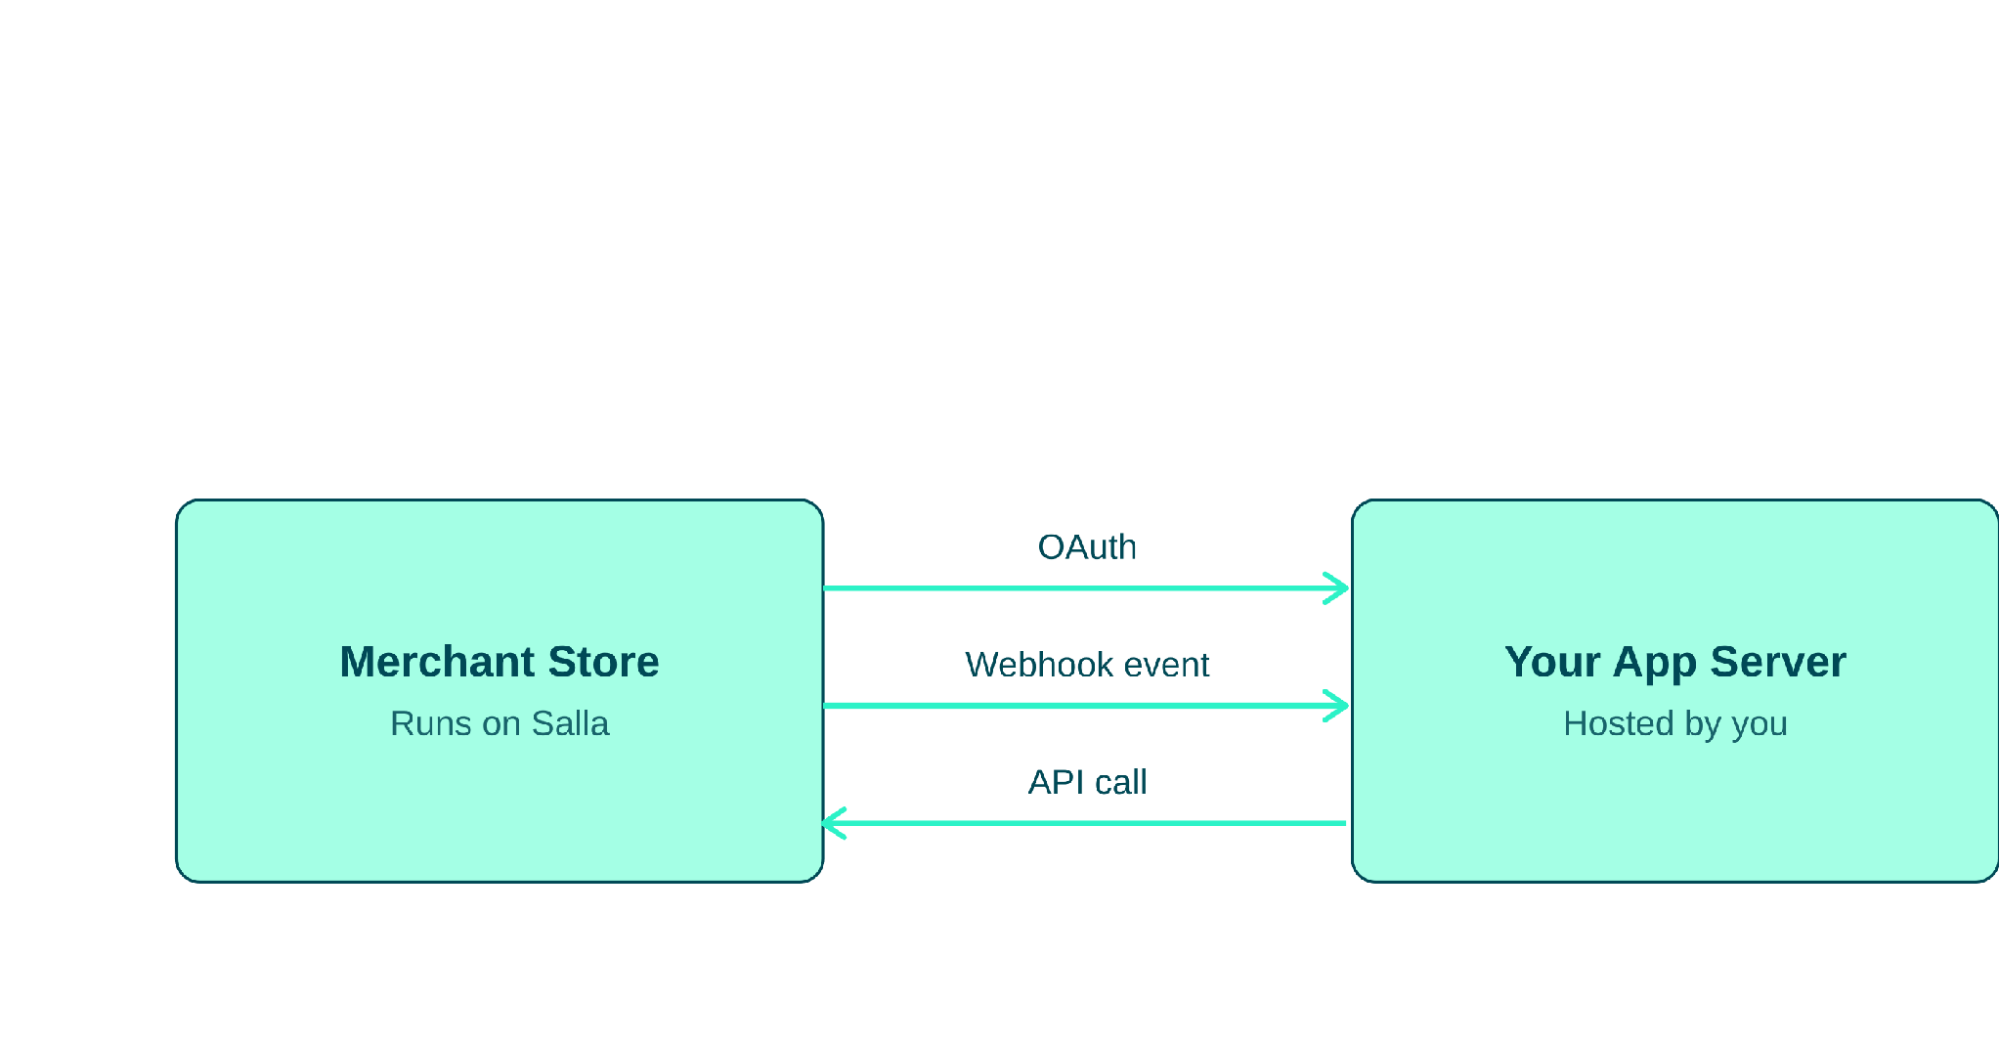
Figure 4.10 - The three core flows between a merchant's store and your app server
Authentication Flow, Step by Step
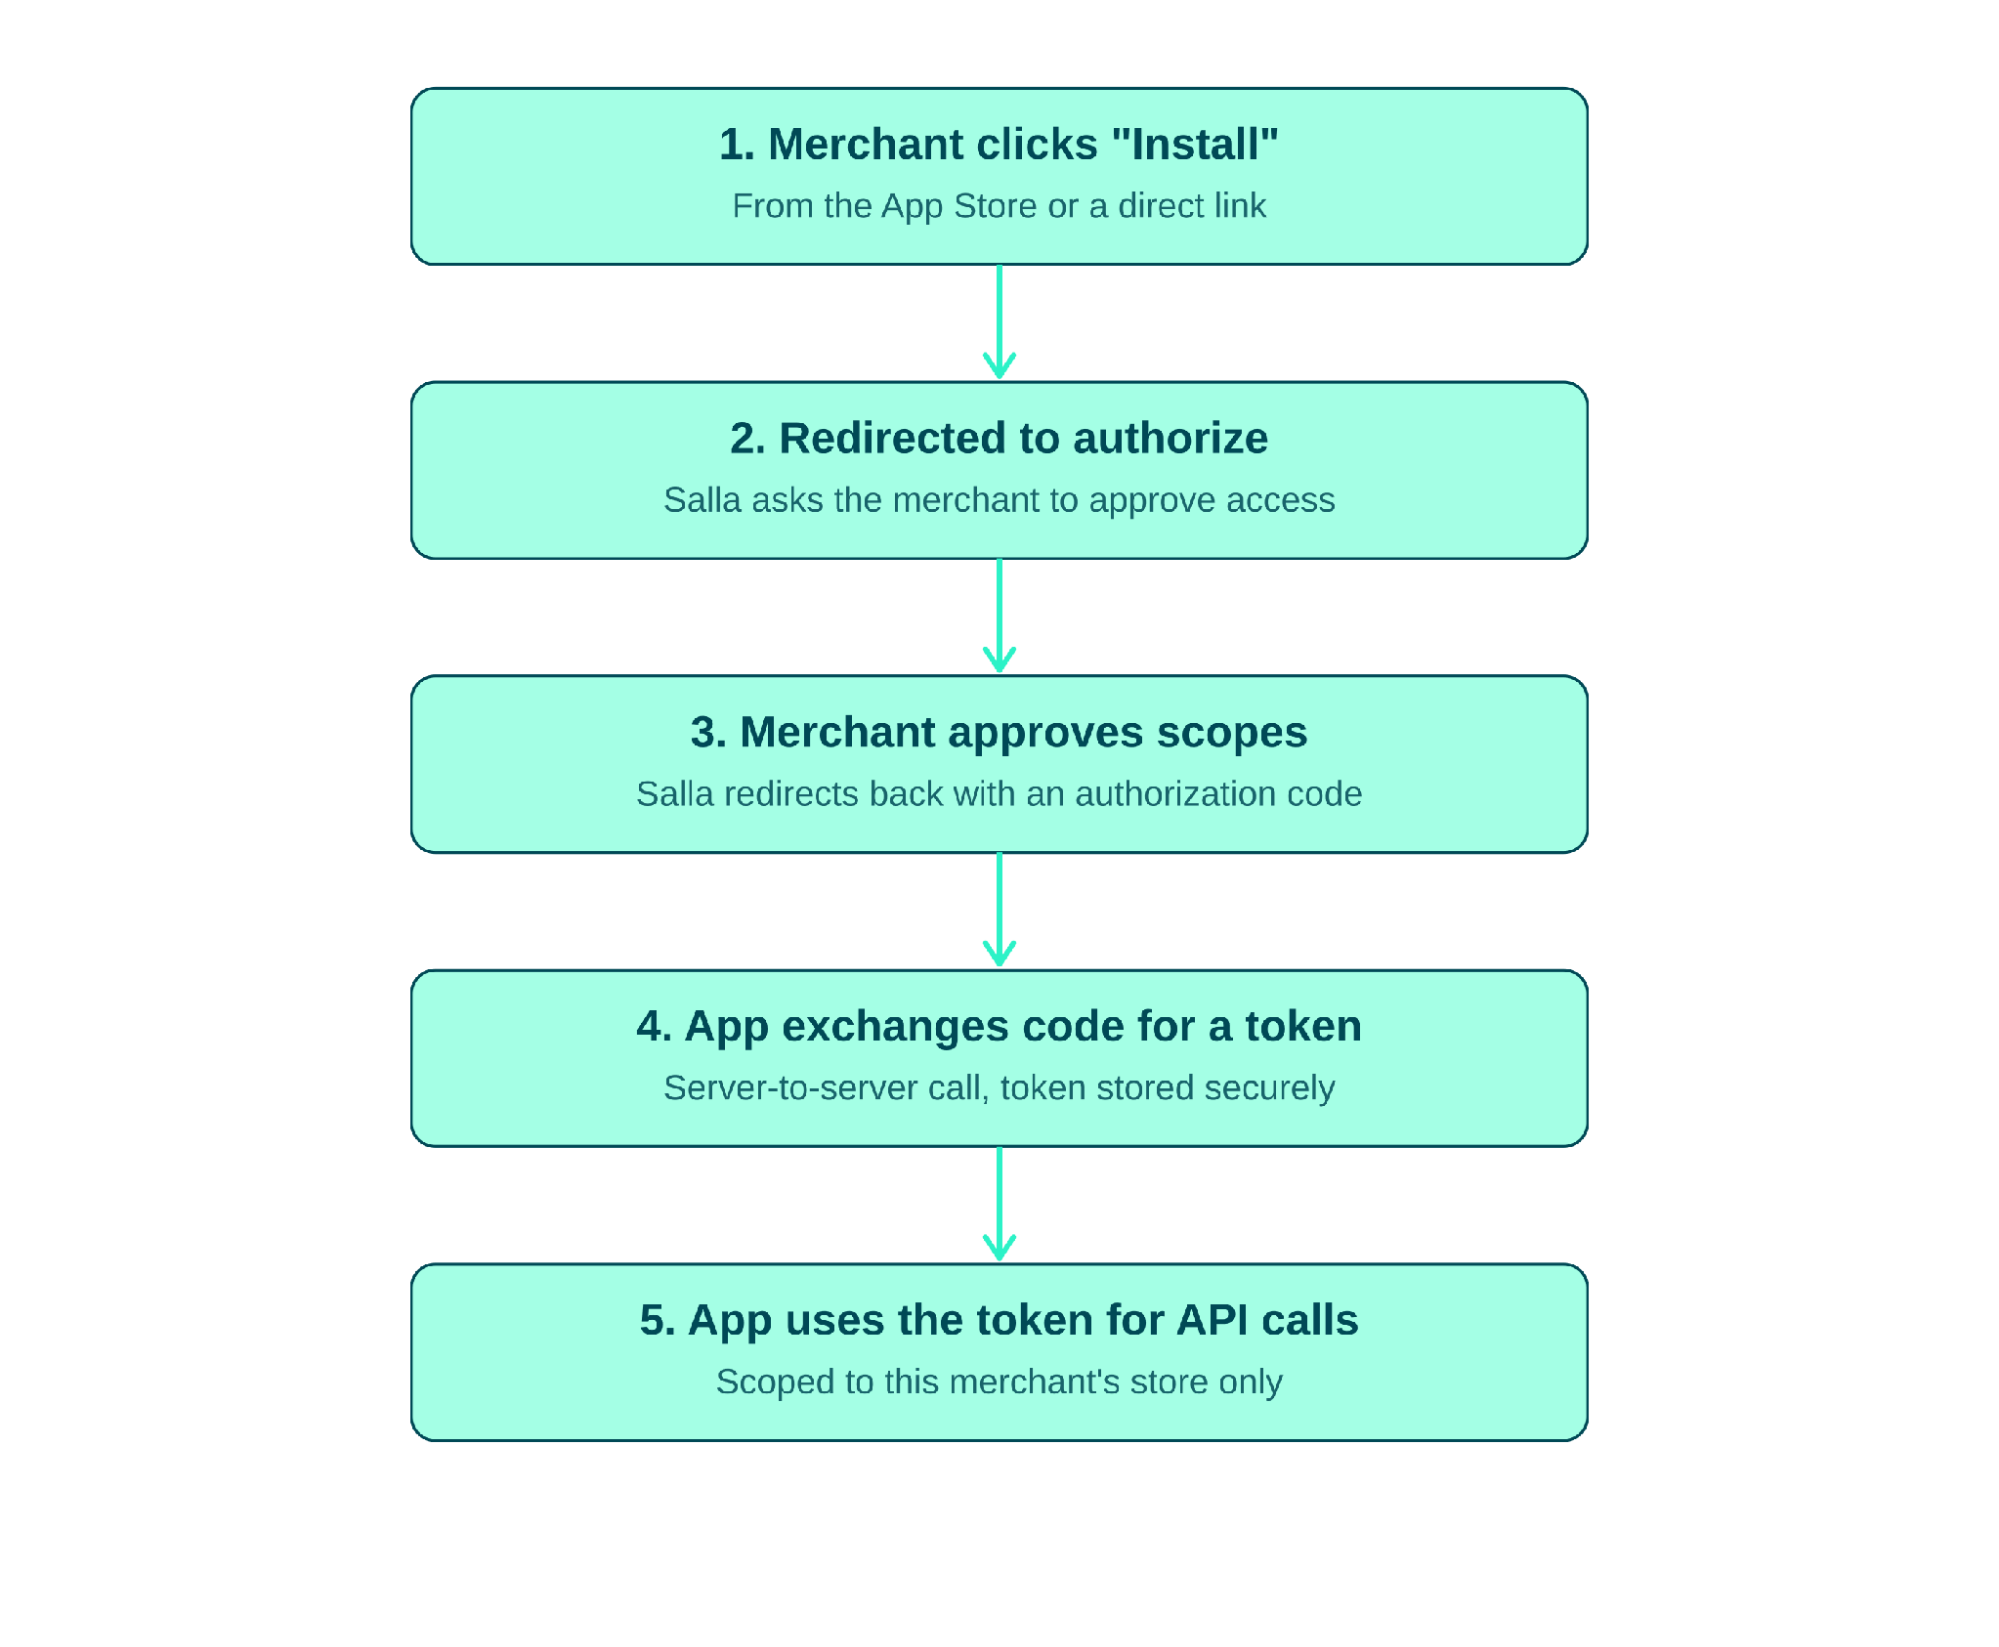
Figure 4.11 - The OAuth authorization sequence, from install to authenticated API calls
Merchant clicks Install
The merchant clicks "Install" on your app, either from the App Store or a direct link you have shared.
Salla shows the authorization screen
Salla redirects the merchant to an authorization screen showing exactly what data your app is requesting access to.
Merchant approves the scopes
The merchant approves (or denies) those scopes. If approved, Salla redirects back to a URL you specify with a temporary authorization code.
Exchange the code for a token
Your app server exchanges that code for an access token via a secure, server-to-server request, this token is used for every subsequent API call on behalf of this merchant.
Store the token securely
Your app stores that token securely, associated with the merchant's store ID, and uses it until it expires or the merchant uninstalls.
// Illustrative pattern only - confirm exact field names
// against Salla's current API reference before implementing.
POST /oauth2/token
{
  "grant_type": "authorization_code",
  "client_id": process.env.SALLA_CLIENT_ID,
  "client_secret": process.env.SALLA_CLIENT_SECRET,
  "code": authorizationCodeFromRedirect,
  "redirect_uri": process.env.APP_BASE_URL + "/oauth/callback"
}
// Response includes an access_token - store this
// securely, scoped to the merchant's store ID.
Scope of This Section
Data Flow
// Illustrative webhook payload - field names may vary;
// confirm against Salla's current webhook reference.
{
  "event": "order.created",
  "merchant": 123456,
  "data": {
    "id": 987654,
    "status": "pending",
    "total": { "amount": 149.00, "currency": "SAR" },
    "customer": { "id": 55123, "name": "Example Customer" }
  }
}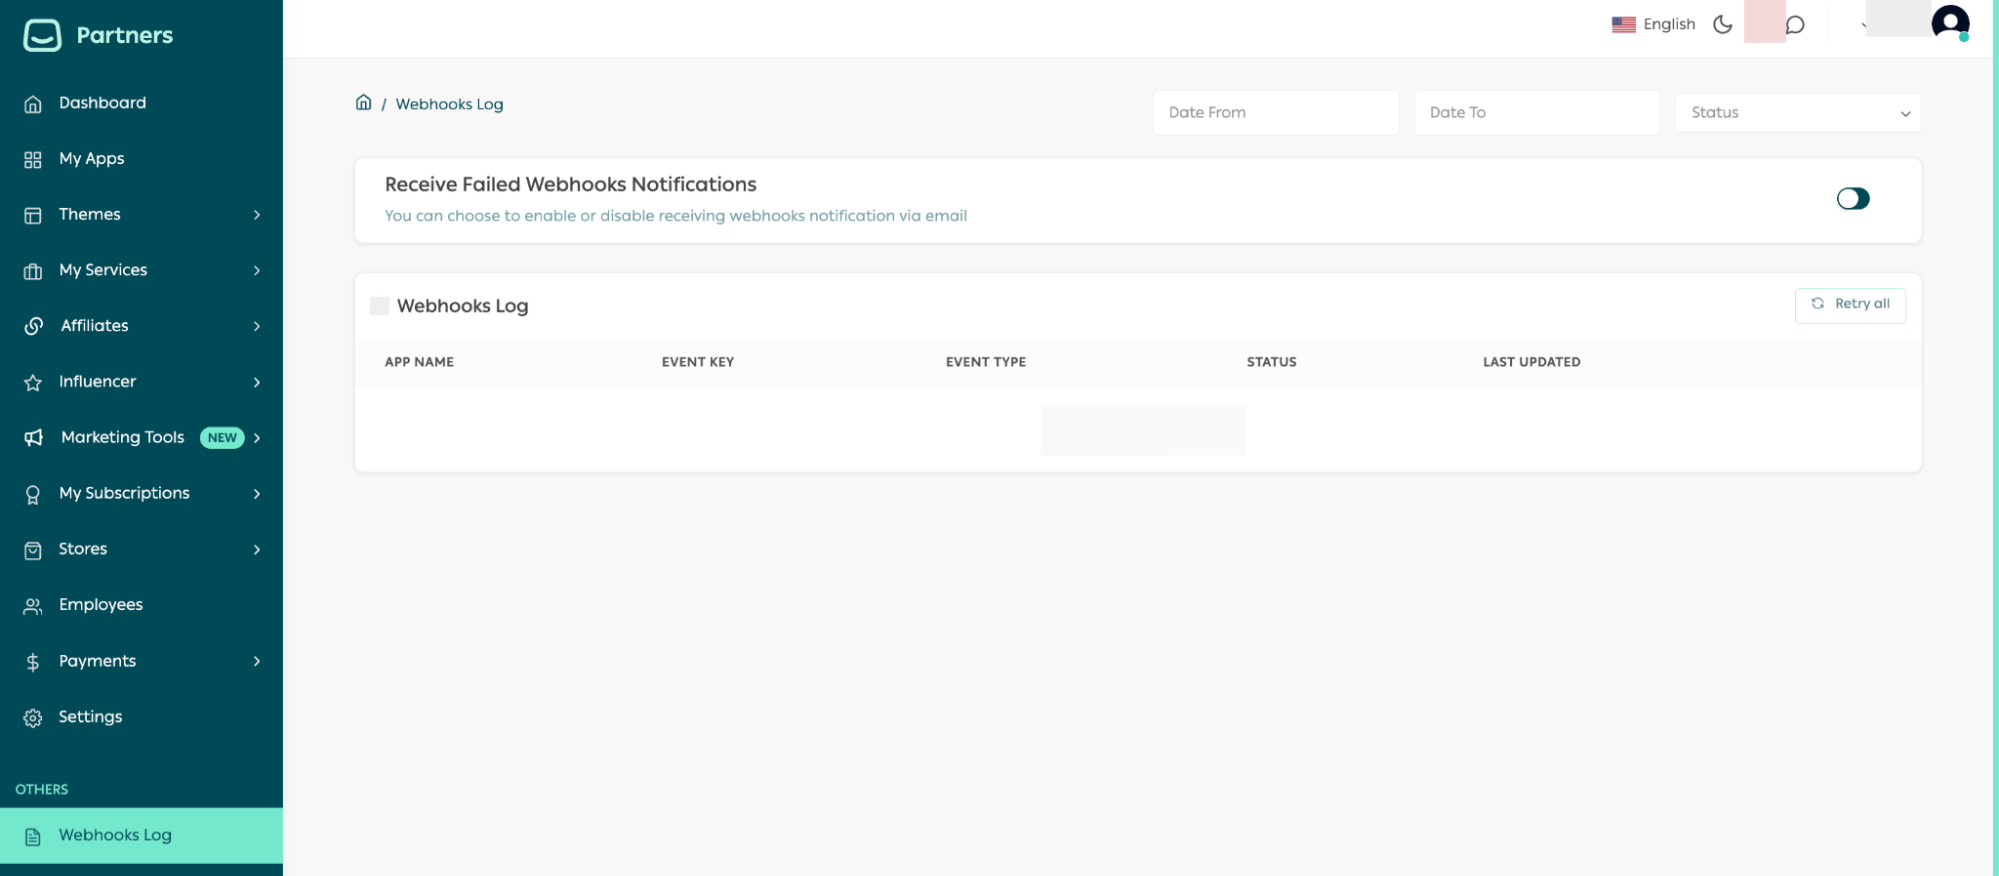
Figure 4.12 - The webhook subscription settings screen in the Partners Portal
App Lifecycle
Created
App entry exists in the Partners Portal; credentials issued.
In development
You are building and testing against your demo store.
Submitted for review
Sent to Salla for review ahead of publishing (Publishing Your App).
Approved / published
Live in the App Store, discoverable by merchants.
Installed
A specific merchant has authorized and is using your app.
Active / uninstalled
Ongoing use, or the merchant has removed the app.
A Step Easy to Miss
Best Practices
Common Mistakes
Modified at 2026-08-18 03:10:46