Your app works. Now it needs to pass review and be genuinely ready for merchants to discover and trust. This article is a literal pre-flight procedure: follow the checklist, understand what reviewers check and why, and learn how to write a listing that converts browsing merchants into installs.
Confirm your app has been tested end to end using the exact procedure from Core Development's Quality Assurance section: install, onboarding, core feature use, error handling, uninstall. Reviewers commonly test this exact path, so if you have already run through it once, you are most of the way to submission-ready.
Reviewers check functional correctness, security practices, appropriate data scope requests, and accurate listing information. Apps in sensitive categories (Communication Apps, AI-Driven Solutions handling customer data) typically face closer scrutiny of data handling, double-check the compliance requirements from Development Preparation before submitting.
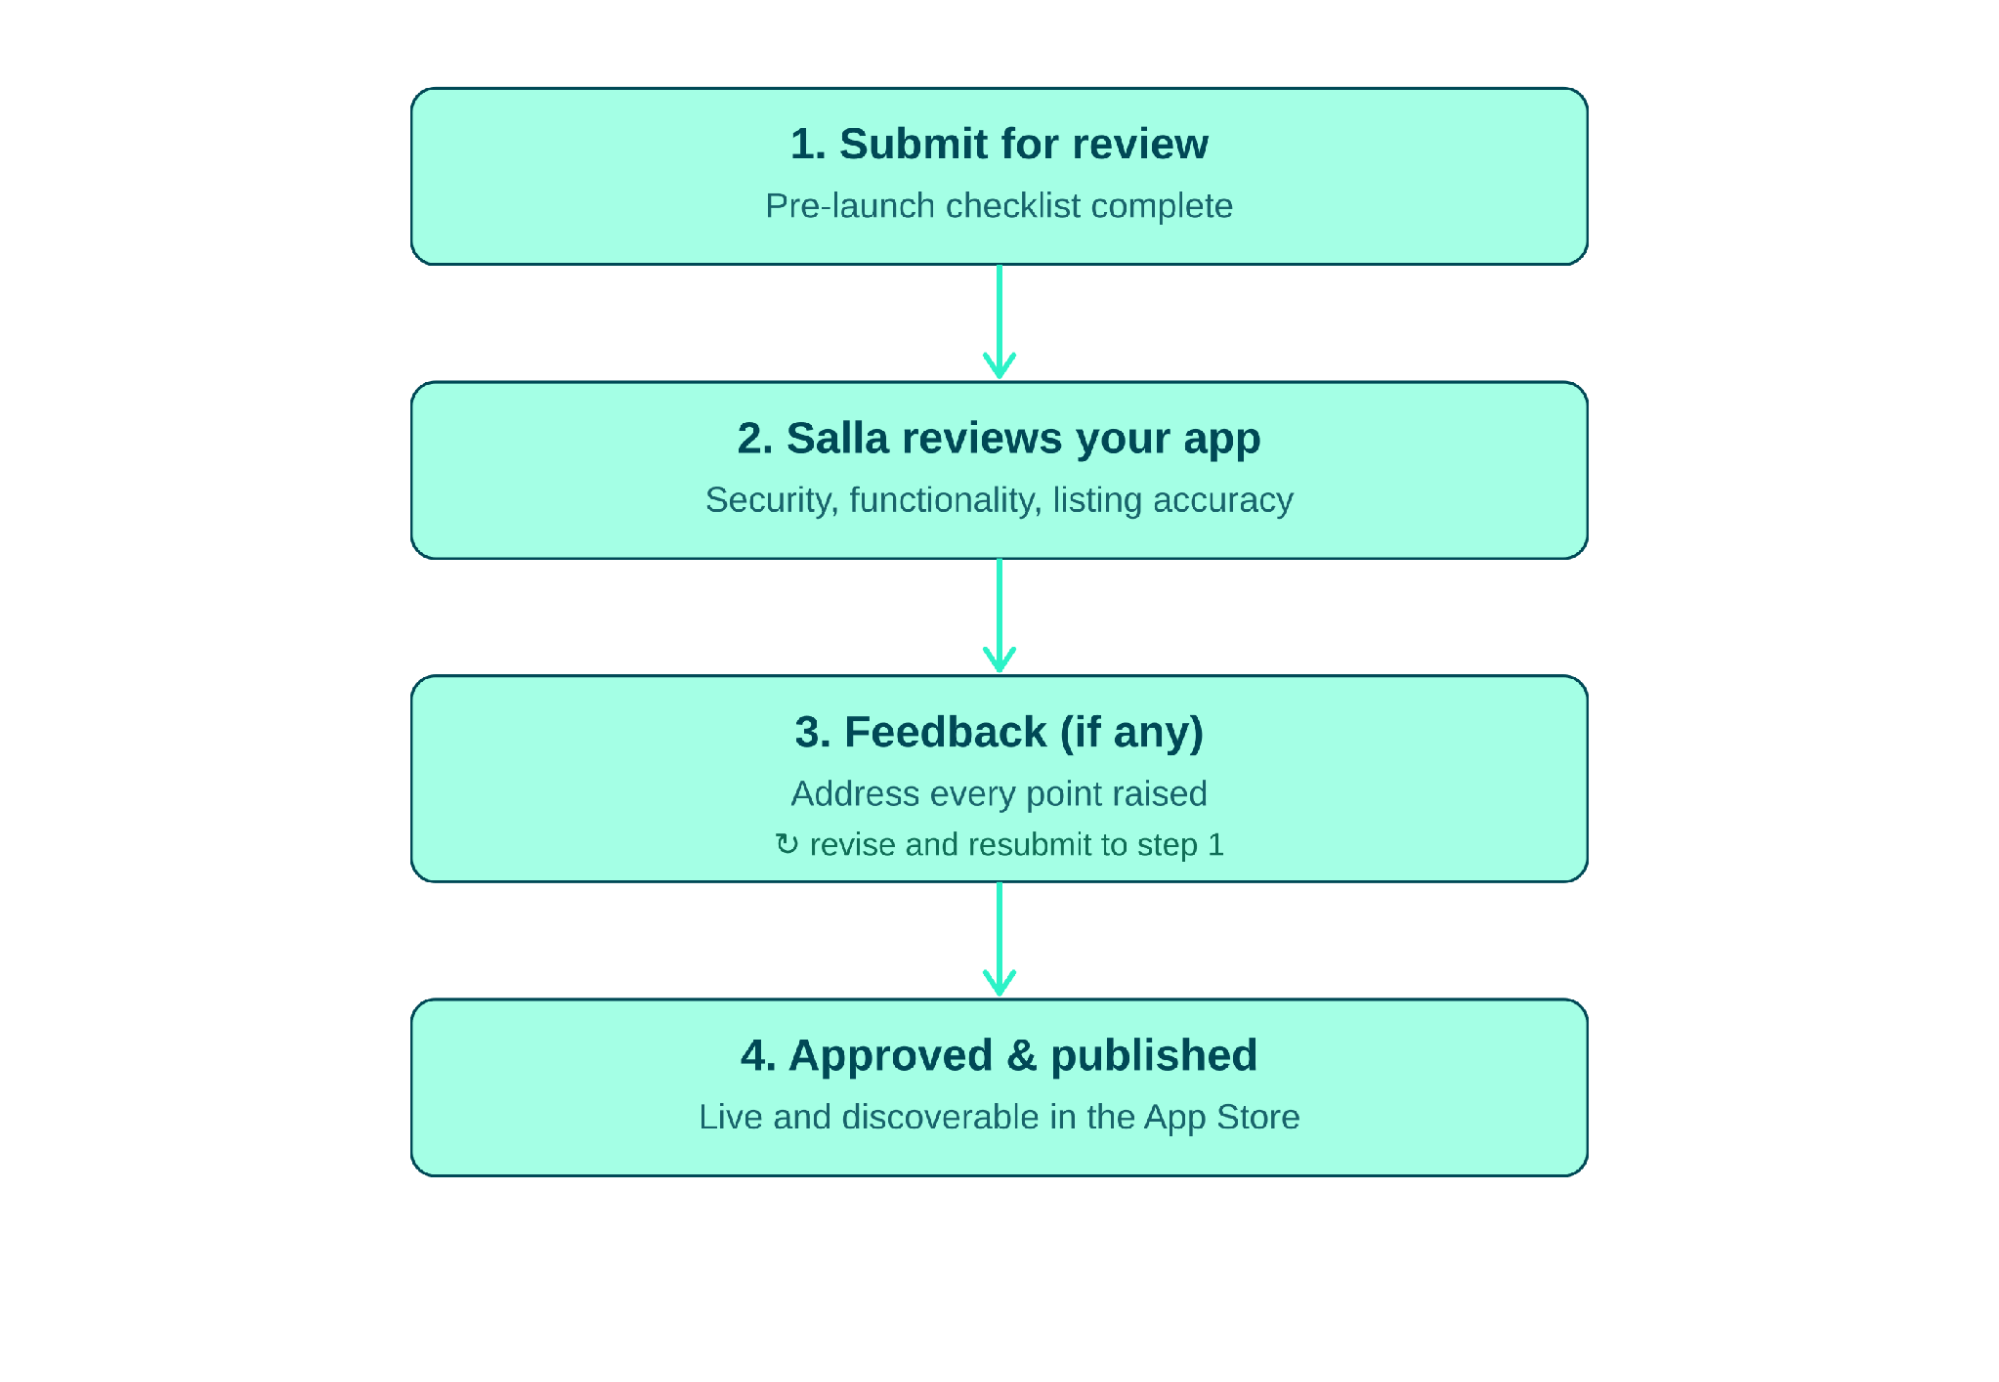
Here is the exact sequence your app goes through once you hit submit. Understanding this loop matters because revision cycles are normal, not a sign something went wrong.
Figure 6.2 - The submission and review cycle, including the normal revision loop
Submit your app through the Partners Portal once all pre-launch checklist items are complete.
2
Wait for review
Build buffer time into your launch plan, since review takes real time and should not be rushed.
3
Address reviewer feedback
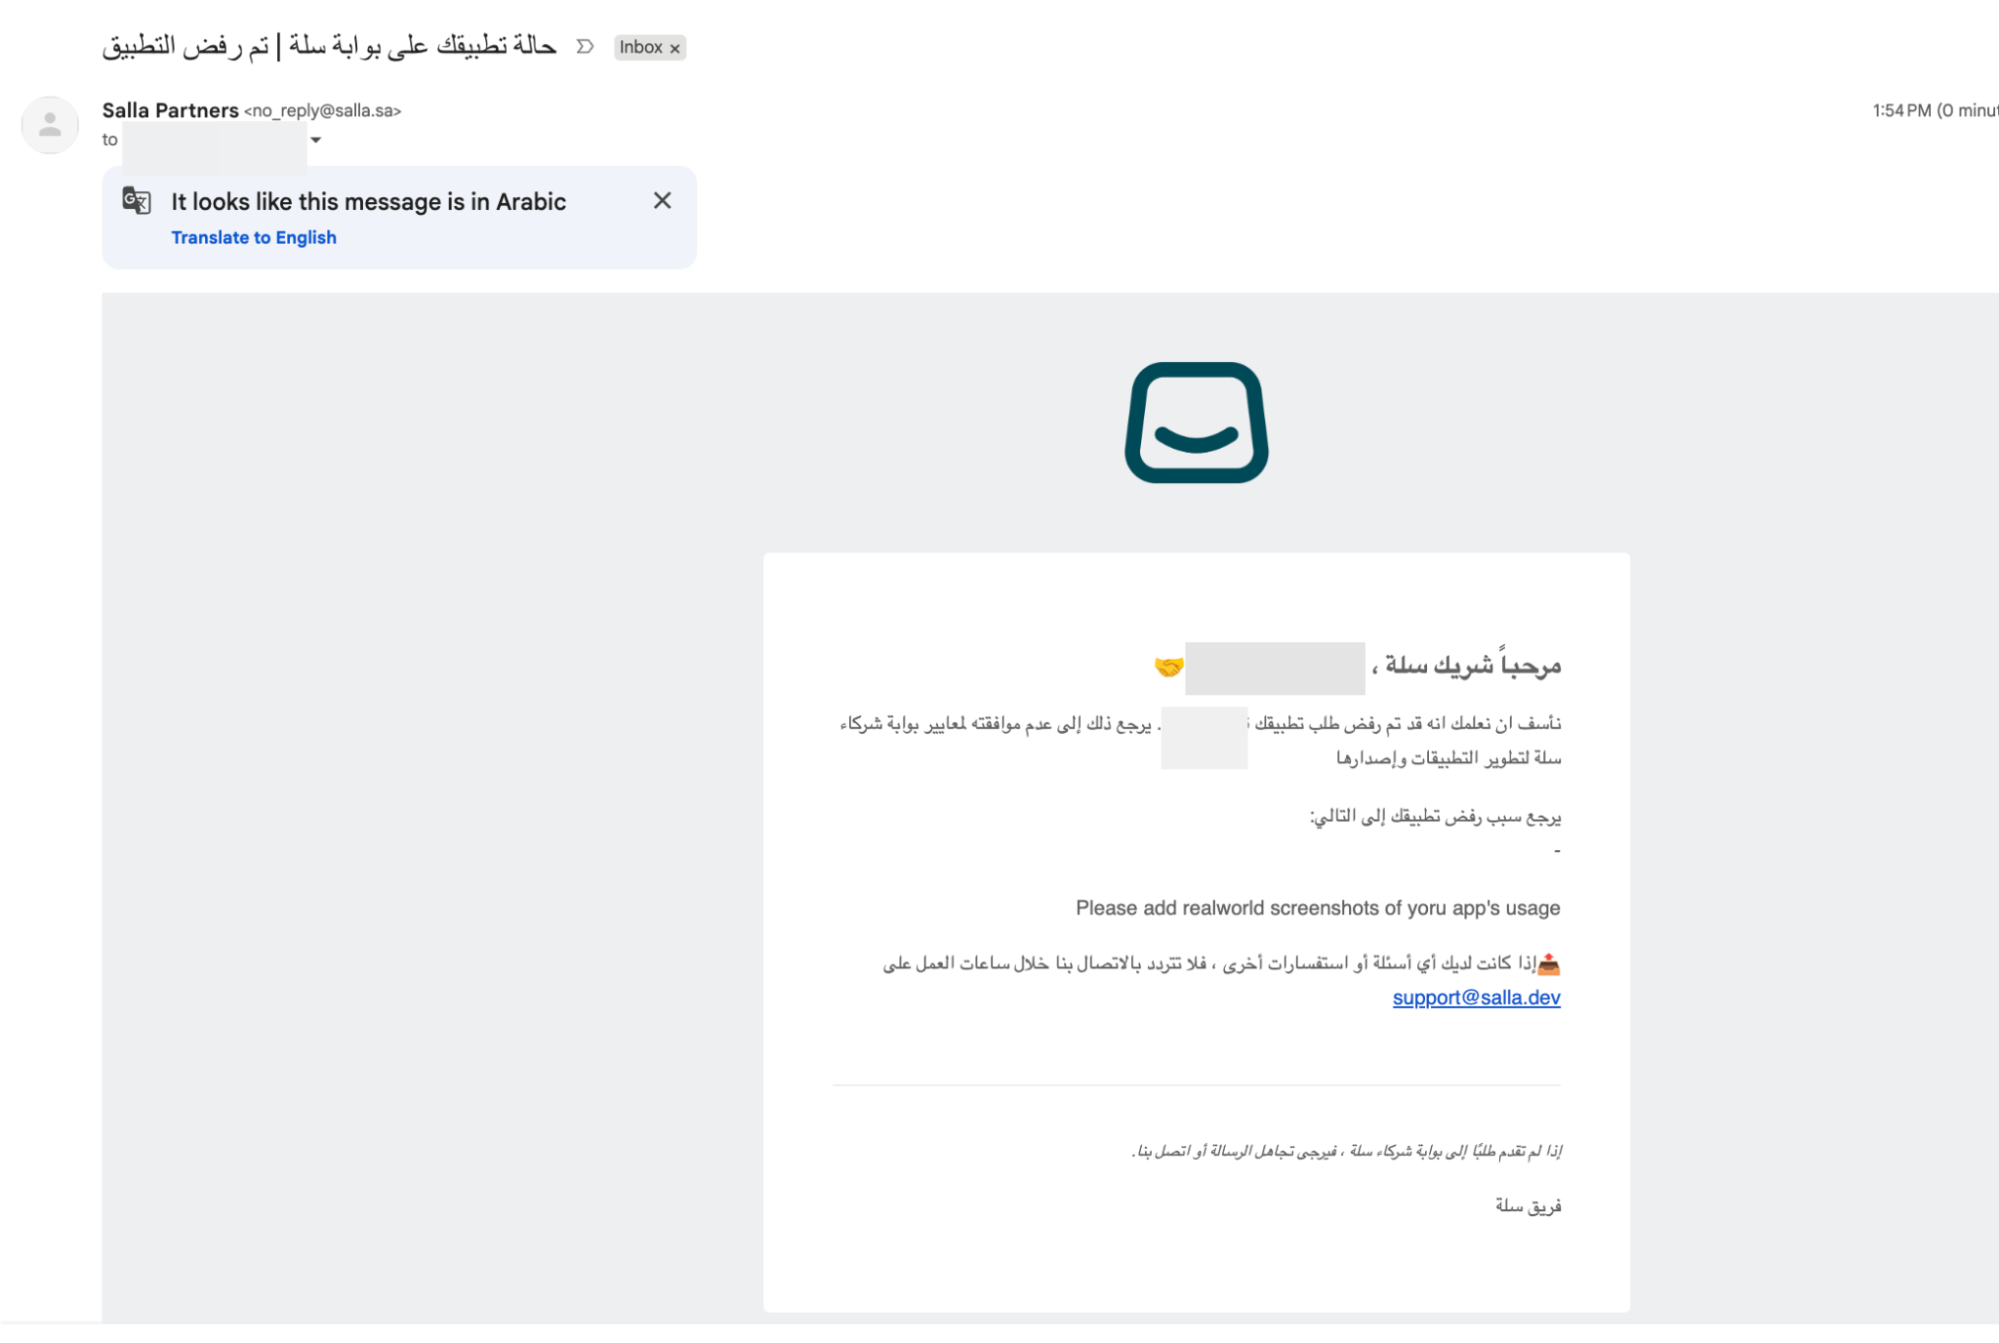
If issues are found, you will receive specific feedback. Read every point carefully and address all of them, not just the ones that seem most important.
4
Resubmit
Most apps go through at least one revision cycle, a normal part of the process, not a failure.
5
Go live
Once approved, your app goes live and becomes discoverable in the App Store.
Figure 6.3 - The review status screen showing reviewer feedback
Plan Around the Review Window
Expect a review period before approval - plan your go-to-market timeline (Growing Your App) around this, not the other way around. Announcing a public launch date before submission is one of the most common avoidable mistakes at this stage.
Best Practices
Build in buffer time for at least one review cycle when planning your launch date.
Address all reviewer feedback points explicitly rather than partially, to avoid repeated review cycles.
Common Mistakes
Announcing a public launch date before submission, then walking it back if review takes longer than expected.
Resubmitting without addressing every point of reviewer feedback.
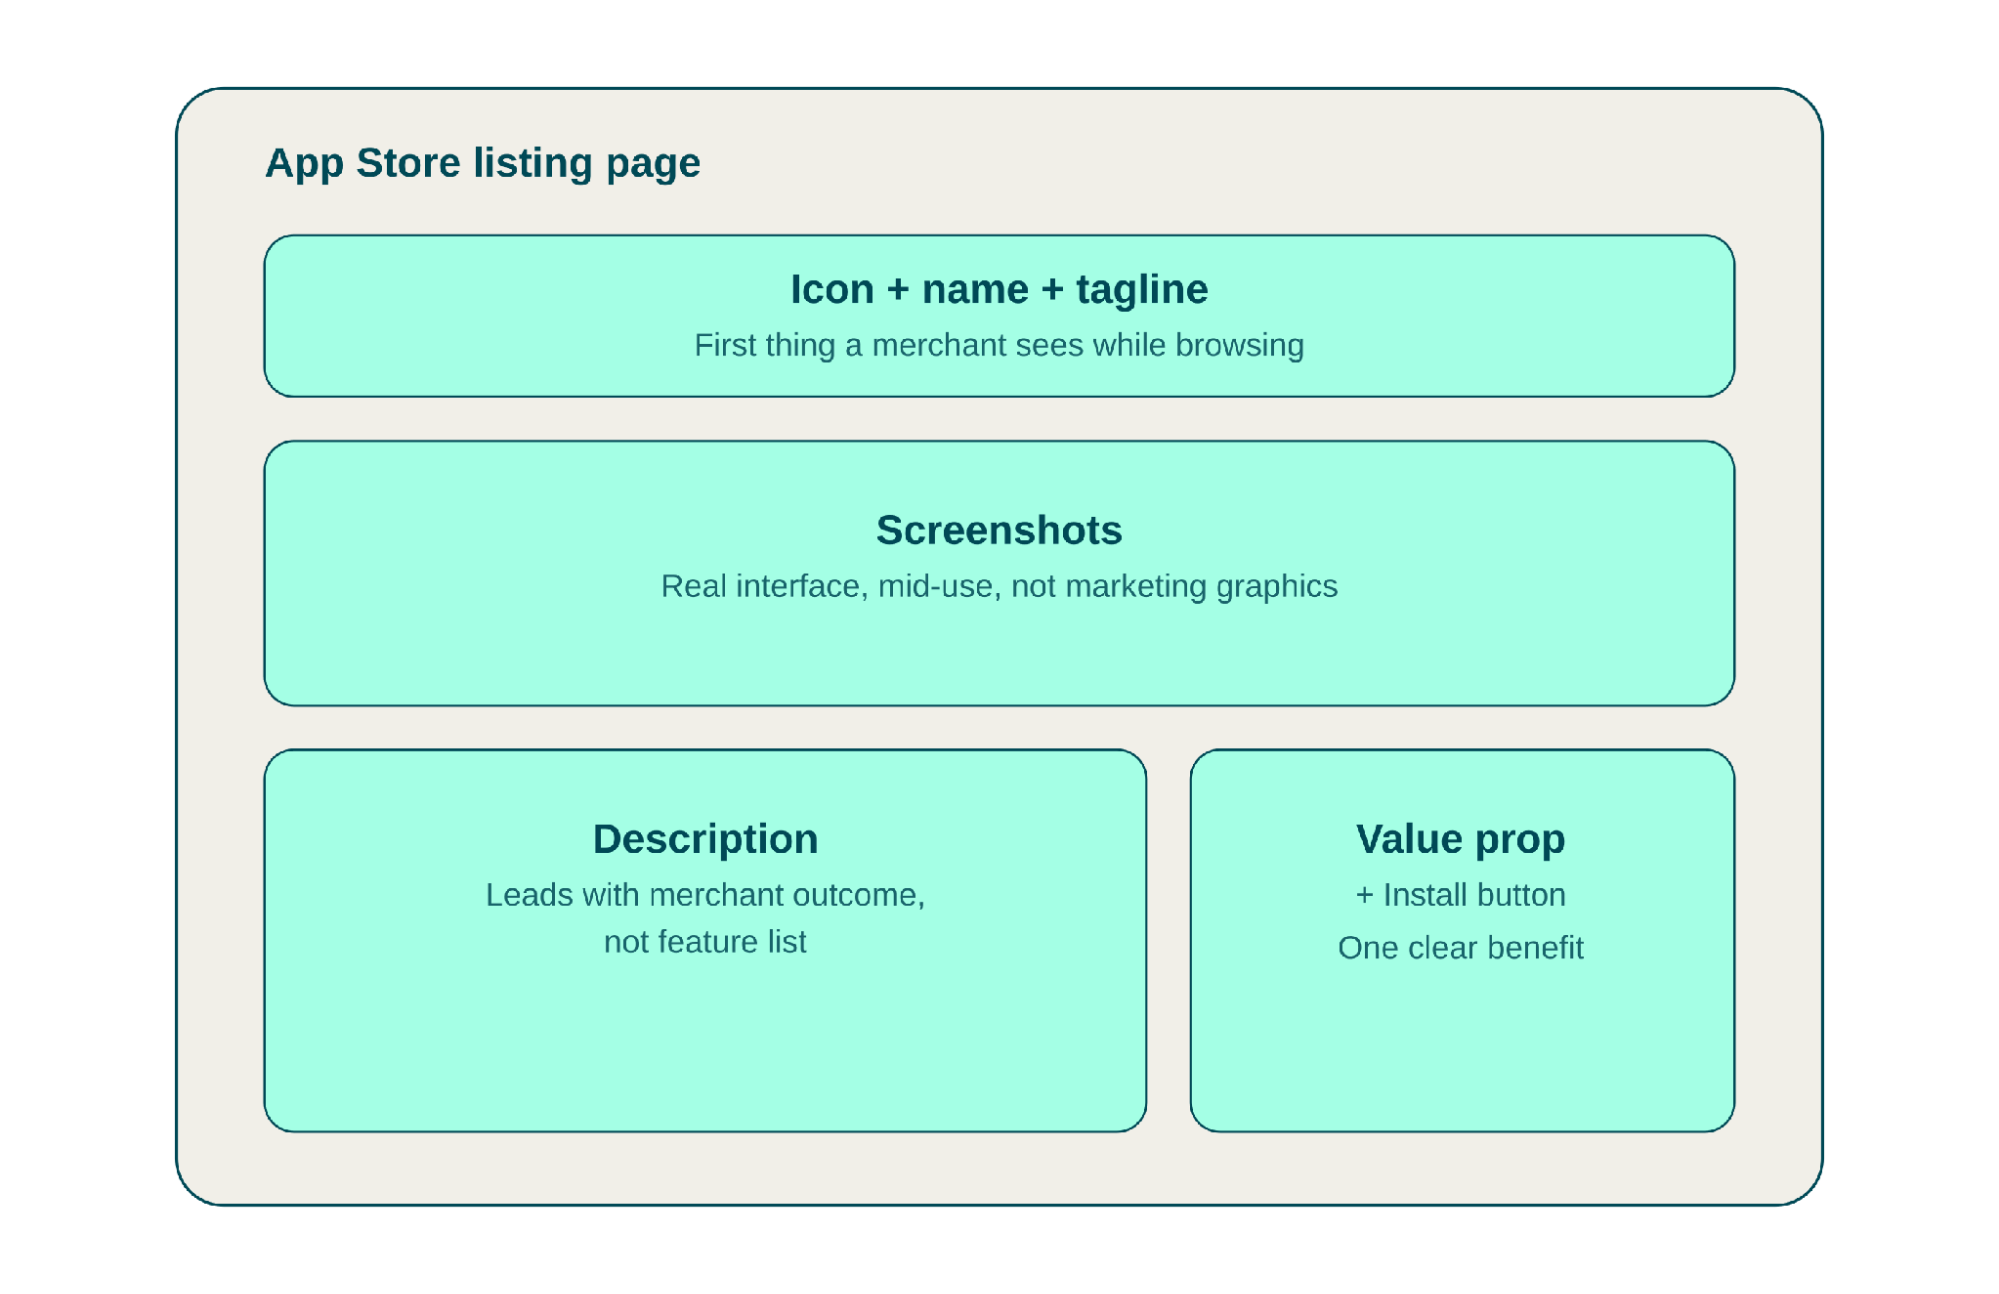
Choose a name that is clear about function, not just brandable. Merchants scanning a category list should understand roughly what your app does from the name alone.
Lead with the merchant outcome, not the feature list:
Weak (feature-first)
Strong (outcome-first)
"Use AI to generate text for your products automatically."
"Write high-converting product descriptions in seconds, in Arabic and English."
"Integrates with multiple shipping carriers via API."
"Compare rates and print labels from 12 carriers without leaving your dashboard."
"Advanced analytics dashboard with customizable reports."
"See which products are about to sell out, three days before they do."
Every strong version names a concrete result the merchant gets, not a description of what the software technically does, the same merchant-outcome thinking from Planning Your App's Setting Objectives, paying off in your listing.
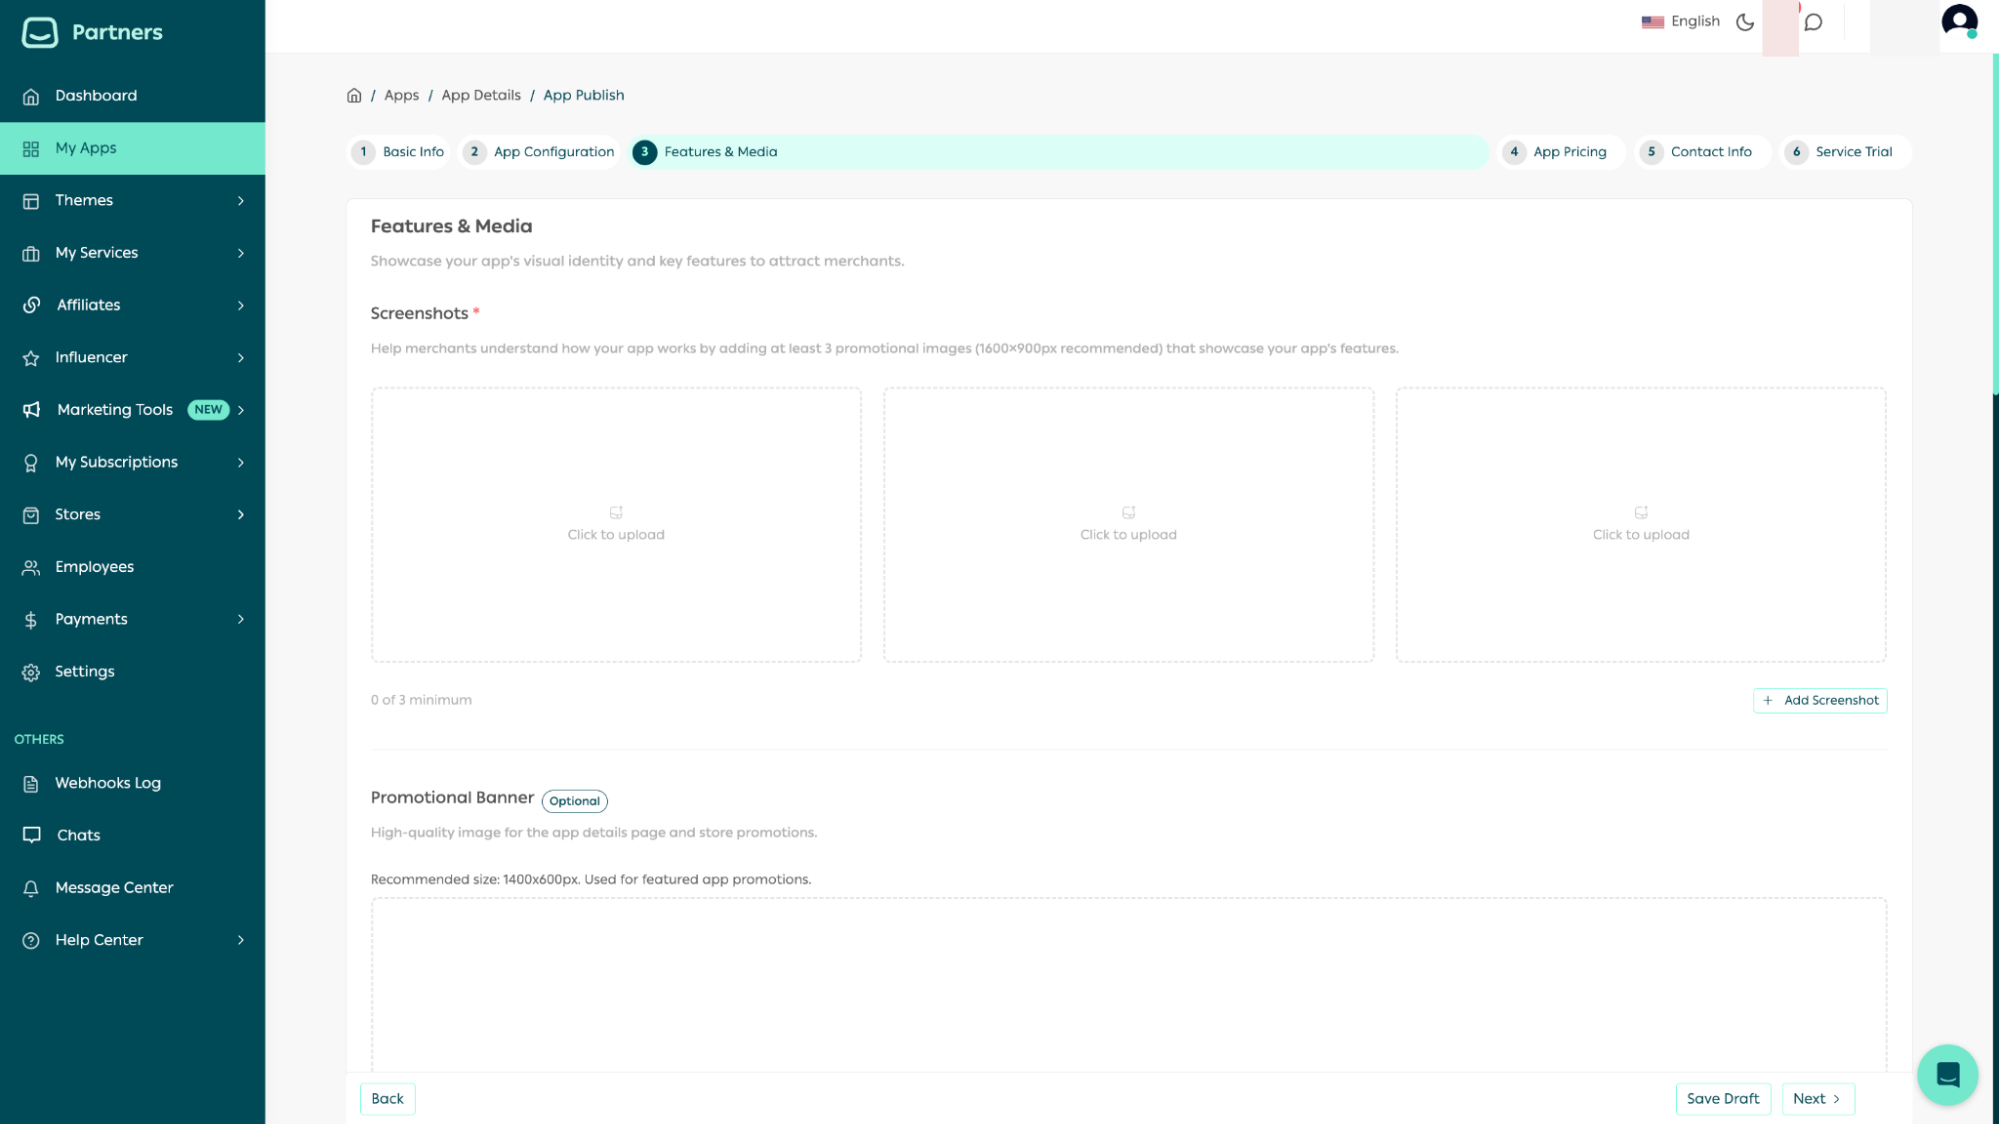
Show the actual app interface, ideally mid-use (a generated description next to the original input) rather than generic marketing graphics. Screenshots are often the single biggest factor in a merchant's install decision.
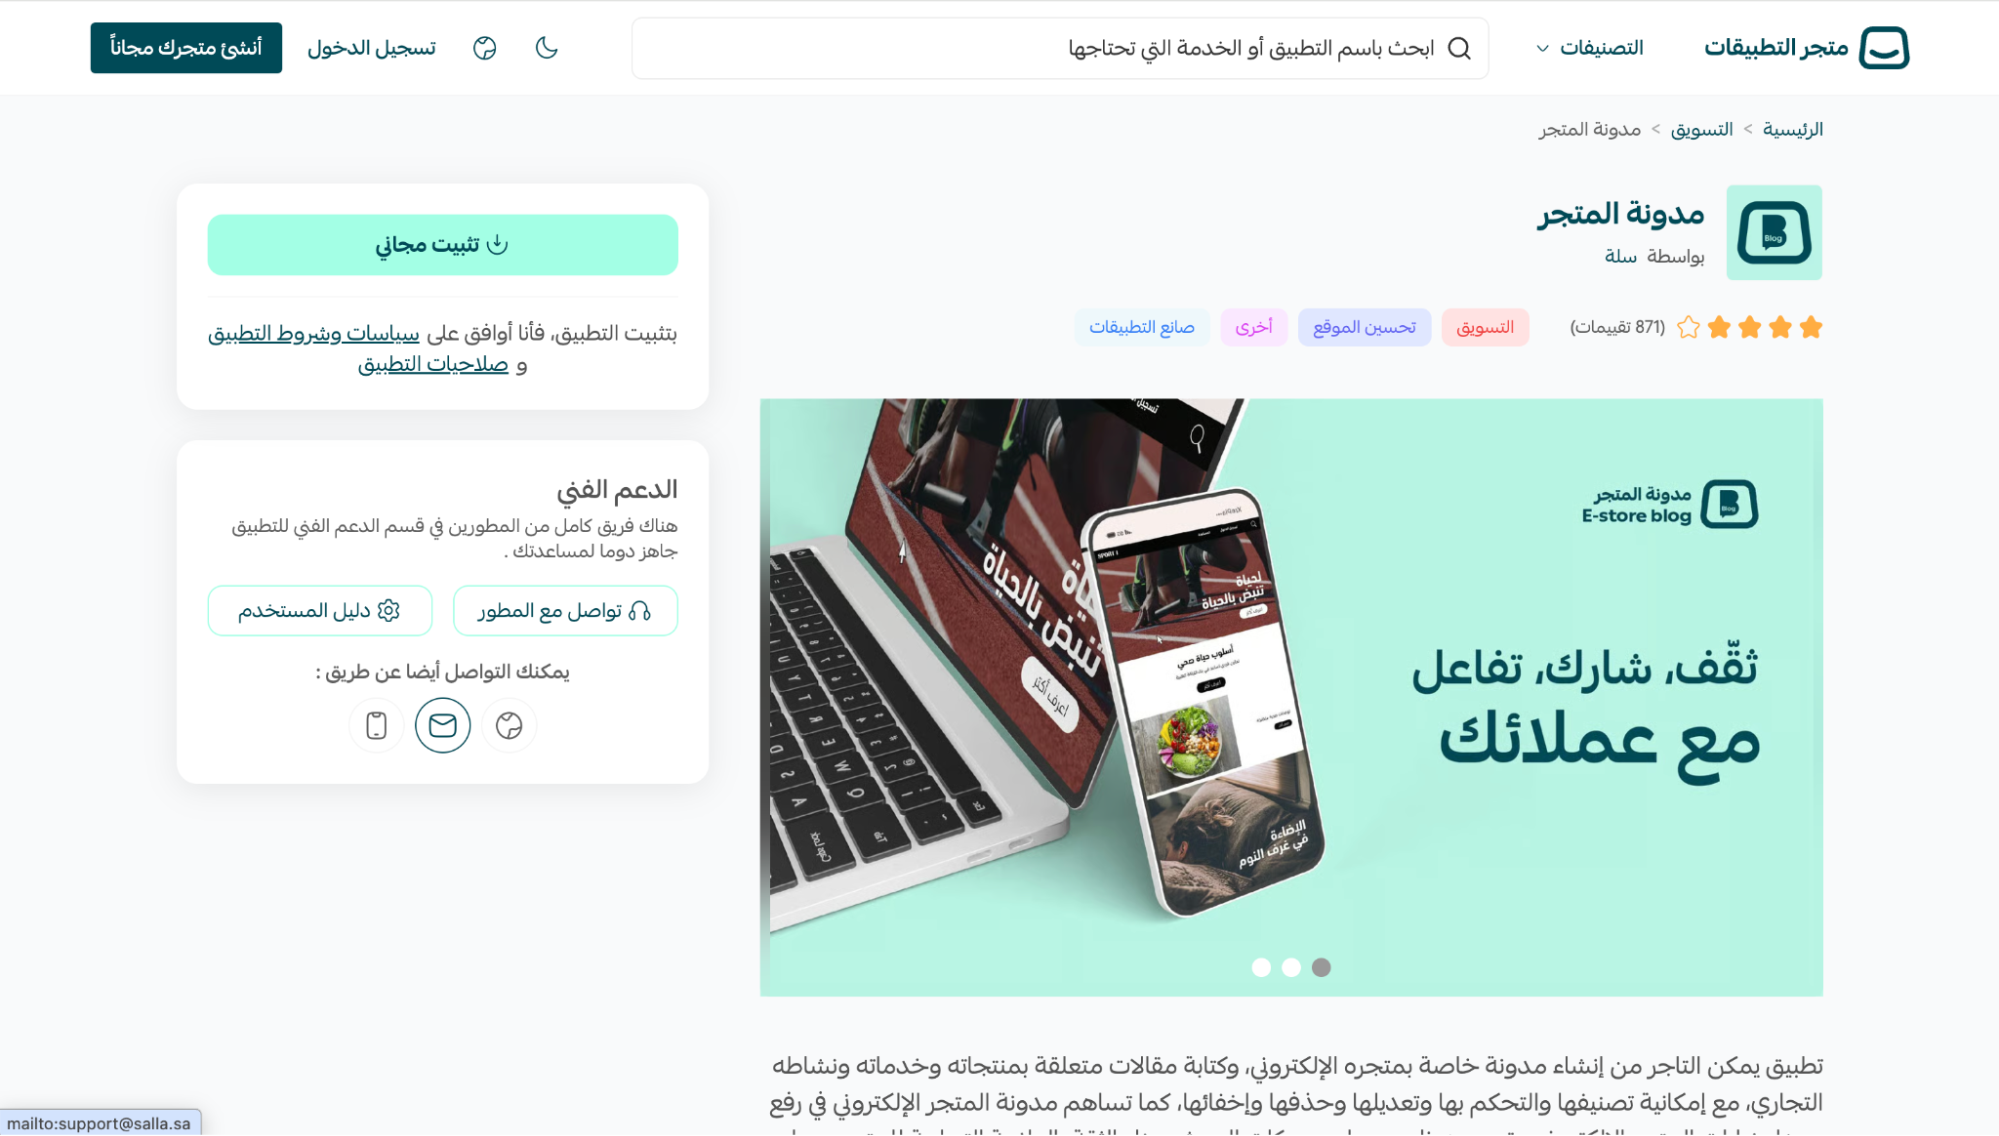
Figure 6.5 - A live App Store listing page, annotated with each optimized element
Restate your Planning Your App value proposition here, refined for a merchant scanning quickly. One sentence, one clear benefit, if you cannot compress it that far, it likely still needs sharpening.
Best Practices
A/B test your listing description and screenshots if your app has enough traffic to make it meaningful.
Keep your listing updated as your app evolves, outdated screenshots erode trust quickly.
Common Mistakes
Writing the description for other developers instead of merchants (too technical, not benefit-focused).
Using stock imagery instead of real product screenshots.